How can we help?

[{id=191604258398, createdAt=1750439292471, updatedAt=1753712801610, path='create-a-receiving-order-from-a-purchase-order', name='Create a Receiving Order from a Purchase Order', 2='{type=string, value=http://rainpos.my.site.com/s/article/Create-a-Receiving-Order-from-a-Purchase-Order}', 4='{type=list, value=[{id=1, name='rain_pos', order=0, label='Rain POS'}, {id=2, name='like_sew', order=1, label='Like Sew'}, {id=3, name='jewel360', order=2, label='Jewel360'}, {id=4, name='music_shop_360', order=3, label='Music Shop 360'}]}', 6='{type=string, value=
Creating a Receiving Order from a Purchase Order
If you have already sent in a Purchase Order and you get your first shipment on the order, you can begin Receiving the inventory in our system. To do this, go to Purchasing > Purchase Orders, find your original Purchase Order and click on its PO Number to open it. You will see all of the original items in the order (and this will happen every time you open the order, even if you've received inventory on it previously), and in the upper left click the Start Receiving button.
Once the order is open, you will see all available items (those that have not yet been received) listed for you. Each will have its check box on the far left in place initially. If you did not yet receive an item, un-check that box and it will be saved for a future receiving order by going into Back Order (more below). In the upper right, you can enter the amount you paid for freight for the shipment, and the system will automatically divide that cost on a proportional basis among the items in the RO (see image below).
For the line-item costs, find your invoice for the shipment and enter the Total for each line item, and the system will automatically do the math and figure the per-item cost for you. If you have entered your shipping cost already, the system will automatically divide it among the items based on their quantities and prices on a weighted basis.
Please Note: If you do not wish for the system to track your shipping costs per item, you can delete the amounts it enters into the shipping column for each line item.
If there are items for the order that you did not receive in this shipment, un-check the checkbox in the Now column for each of those items. The item will be grayed out and will automatically go into Backorder status so it can be received in the future.
If you want to remove an item from the order permanently, follow these steps: 1) set the quantity box next to Now to 0, 2) un-check the No BO checkbox on the far right, and 3) check the checkbox on the far left for Now. If you see the Now quantity box and the Total box for Cost turn red, the item will be permanently removed from the Order when you complete it.
At any point you can Print your Order, if needed. You also have the option to save a Draft. Once you have completed the Receiving Order, click the Complete button and your inventory totals for each active line item for quantity and costs will be added and saved to the system. You will then be offered the option of printing barcode labels for all items in the RO, and you can print all or part of the list of labels as needed.
}', 22='{type=option, value={id=2, name='recommended_extra', order=1, label='Recommended Extra'}}', 9='{type=string, value=Create a Receiving Order from a Purchase Order}', 25='{type=number, value=0}', 26='{type=list, value=[{id=190209692543, name='Purchasing'}]}', 28='{type=string, value=Create a Receiving Order from a Purchase Order Creating a Receiving Order from a Purchase Order If you have already sent in a Purchase Order and you get your first shipment on the order, you can begin Receiving the inventory in our system. To do this, go to Purchasing > Purchase Orders, find your original Purchase Order and click on its PO Number to open it. You will see all of the original items in the order (and this will happen every time you open the order, even if you've received inventory on it previously), and in the upper left click the Start Receiving button. Once the order is open, you will see all available items (those that have not yet been received) listed for you. Each will have its check box on the far left in place initially. If you did not yet receive an item, un-check that box and it will be saved for a future receiving order by going into Back Order (more below). In the upper right, you can enter the amount you paid for freight for the shipment, and the system will automatically divide that cost on a proportional basis among the items in the RO (see image below). For the line-item costs, find your invoice for the shipment and enter the Total for each line item, and the system will automatically do the math and figure the per-item cost for you. If you have entered your shipping cost already, the system will automatically divide it among the items based on their quantities and prices on a weighted basis. Please Note: If you do not wish for the system to track your shipping costs per item, you can delete the amounts it enters into the shipping column for each line item. If there are items for the order that you did not receive in this shipment, un-check the checkbox in the Now column for each of those items. The item will be grayed out and will automatically go into Backorder status so it can be received in the future. If you want to remove an item from the order permanently, follow these steps: 1) set the quantity box next to Now to 0, 2) un-check the No BO checkbox on the far right, and 3) check the checkbox on the far left for Now. If you see the Now quantity box and the Total box for Cost turn red, the item will be permanently removed from the Order when you complete it. At any point you can Print your Order, if needed. You also have the option to save a Draft. Once you have completed the Receiving Order, click the Complete button and your inventory totals for each active line item for quantity and costs will be added and saved to the system. You will then be offered the option of printing barcode labels for all items in the RO, and you can print all or part of the list of labels as needed. Purchasing}'}, {id=191604258563, createdAt=1750439292566, updatedAt=1769704154588, path='integrated-ordering-with-accuquilt', name='Integrated Ordering with AccuQuilt', 2='{type=string, value=http://rainpos.my.site.com/s/article/Integrated-Ordering-with-AccuQuilt}', 4='{type=list, value=[{id=2, name='like_sew', order=1, label='Like Sew'}]}', 6='{type=string, value=
This article details the newest version of our integrated ordering with AccuQuilt. This newest integration is as easy as we can make it! Once you use the steps below to set up, every order you make with AccuQuilt, whether it's through their website or with one of their representative or over the phone, will automatically generate a Purchase Order for you in your LifeSaver Software system! In addition, products that are new to your system will automatically be created in this process, and they'll be highlighted for you as 'review' items so you can make sure the new products have the details they need.
The integration also automates email notifications from AccuQuilt every time they ship you an order. When that email is sent, in the system, the integration will automatically create a Receiving Order for you with the contents of the shipment.
Please Note: Before you can use the integration, you will need to activate it by clicking the Admin Button with your username in the upper right and go to Beta Features. Find the PO/RO Vendor Integration area and and toggle the switch for AccuQuilt to Yes. Then click Save at the bottom.
Once that is set, you can update the Vendor listing so the integration will be active for your orders.
Setting Up AccuQuilt Vendor Integration
1. Log into LifeSaver Software.
2. Click on Purchasing > Vendors.
4. Click +New Vendor to create a new vendor, or click on the Vendor ID for AccuQuilt if you've already saved them in the system.
5. On the Details tab, click on the drop-list arrow for Integration and select AccuQuilt. The Vendor name will automatically populate.
6. Add your vendor Account Number. PLEASE NOTE: You will need to contact AccuQuilt to get your account number, as they don't use traditional account numbers for merchant orders. You can contact your account manager directly to obtain your customer number or you can just call 402-934-1110. Once you have it, enter it in this field.
7. Click on the Locations Account Info tab.
8. Enter your Vendor Account ID, even if you only have a single Location in the system. If you have multiple Locations, there will be fields for each of them.
9. Click Save to finalize your setup.
Please Note: You no longer need to use the tabs for Integration or Instant Order. None of those functions are necessary for this new Integration.
Using the Vendor Integration
When you are ready to make an order with the integration, you will simply order items through your normal channels (with your vendor representative, on their website, or over the phone / by fax). Once the order has been placed, the vendor system will communicate with the LifeSaver Software to create a Purchase Order for you automatically. For products that have never been in your system, they will be created for you via the catalog from the vendor.
The PO will display in your list of Purchase Orders and will have an asterisk in front of it to let you know it came through the automated integration, as shown below.
When the order ships to your store, you'll be notified by email. A Receiving Order will be created for you with the actual items, quantities, and costs in the order, and it will have an asterisk by it in your list of RO's. Once you receive the shipment, you can click to complete the receipt of the inventory. The final steps will be reviewing the new products (adding them to categories, etc) and printing labels, if needed.
Low Inventory Integration Coming Soon
In the near future, AccuQuilt plans to finish integration with the low inventory system in Like Sew so that your low inventory items can be populated automatically into your orders at the AccuQuilt website. For now, that integration is not yet available.
}', 22='{type=option, value={id=3, name='faq', order=2, label='FAQ'}}', 9='{type=string, value=Integrated Ordering with AccuQuilt}', 25='{type=number, value=0}', 26='{type=list, value=[{id=190209692545, name='Settings'}]}', 28='{type=string, value=Integrated Ordering with AccuQuilt This article details the newest version of our integrated ordering with AccuQuilt. This newest integration is as easy as we can make it! Once you use the steps below to set up, every order you make with AccuQuilt, whether it's through their website or with one of their representative or over the phone, will automatically generate a Purchase Order for you in your LifeSaver Software system! In addition, products that are new to your system will automatically be created in this process, and they'll be highlighted for you as 'review' items so you can make sure the new products have the details they need. The integration also automates email notifications from AccuQuilt every time they ship you an order. When that email is sent, in the system, the integration will automatically create a Receiving Order for you with the contents of the shipment. Please Note: Before you can use the integration, you will need to activate it by clicking the Admin Button with your username in the upper right and go to Beta Features. Find the PO/RO Vendor Integration area and and toggle the switch for AccuQuilt to Yes. Then click Save at the bottom. Once that is set, you can update the Vendor listing so the integration will be active for your orders. Setting Up AccuQuilt Vendor Integration 1. Log into LifeSaver Software. 2. Click on Purchasing > Vendors. 4. Click +New Vendor to create a new vendor, or click on the Vendor ID for AccuQuilt if you've already saved them in the system. 5. On the Details tab, click on the drop-list arrow for Integration and select AccuQuilt. The Vendor name will automatically populate. 6. Add your vendor Account Number. PLEASE NOTE: You will need to contact AccuQuilt to get your account number, as they don't use traditional account numbers for merchant orders. You can contact your account manager directly to obtain your customer number or you can just call 402-934-1110. Once you have it, enter it in this field. 7. Click on the Locations Account Info tab. 8. Enter your Vendor Account ID, even if you only have a single Location in the system. If you have multiple Locations, there will be fields for each of them. 9. Click Save to finalize your setup. Please Note: You no longer need to use the tabs for Integration or Instant Order. None of those functions are necessary for this new Integration. Using the Vendor Integration When you are ready to make an order with the integration, you will simply order items through your normal channels (with your vendor representative, on their website, or over the phone / by fax). Once the order has been placed, the vendor system will communicate with the LifeSaver Software to create a Purchase Order for you automatically. For products that have never been in your system, they will be created for you via the catalog from the vendor. The PO will display in your list of Purchase Orders and will have an asterisk in front of it to let you know it came through the automated integration, as shown below. When the order ships to your store, you'll be notified by email. A Receiving Order will be created for you with the actual items, quantities, and costs in the order, and it will have an asterisk by it in your list of RO's. Once you receive the shipment, you can click to complete the receipt of the inventory. The final steps will be reviewing the new products (adding them to categories, etc) and printing labels, if needed. Low Inventory Integration Coming Soon In the near future, AccuQuilt plans to finish integration with the low inventory system in Like Sew so that your low inventory items can be populated automatically into your orders at the AccuQuilt website. For now, that integration is not yet available. Settings purchase orders integrations}'}, {id=191604258564, createdAt=1750439292567, updatedAt=1769704153035, path='integrated-ordering-with-e-e-schenck', name='Integrated Ordering with E.E. Schenck', 2='{type=string, value=http://rainpos.my.site.com/s/article/Integrated-Ordering-with-E-E-Schenck}', 4='{type=list, value=[{id=2, name='like_sew', order=1, label='Like Sew'}]}', 6='{type=string, value=
This article details the newest version of our integrated ordering with E.E. Schenck. This integration is as easy as we can make it! Once you use the steps below to set up, every order you make with E.E. Schenck, whether it's through their website or with one of their representative or over the phone, will automatically generate a Purchase Order for you in your LifeSaver Software system! In addition, products that are new to your system will automatically be created in this process, and they'll be highlighted for you as 'review' items so you can make sure the new products have the details they need.
The integration also automates email notifications from E.E. Schenck every time they ship you an order. When that email is sent, in the system, the integration will automatically create a Receiving Order for you with the contents of the shipment.
Please Note: Before you can use the integration, you will need to activate it by going to the Admin Button with your username in the upper right and go to Settings > Integrations > Vendors and toggle the switch for E.E. Schenck to Yes. Then click Save at the bottom to save your settings.
Setting Up E.E. Schenck Vendor Integration
1. Log into LifeSaver Software.
2. Click on Purchasing > Vendors.
4. Click +New Vendor to create a new vendor, or click on the Vendor ID for E.E. Schenck if you've already saved them in the system.
5. On the Details tab, click on the drop-list arrow for Integration and select E.E. Schenck. The Vendor name will automatically populate.
6. Add your vendor Account Number (if you do not know it, contact your vendor for help).
7. Click on the Locations Account Info tab.
8. Enter your Vendor Account ID, even if you only have a single Location in the system. If you have multiple Locations, there will be fields for each of them.
9. Click Save to finalize your setup.
Please Note: You no longer need to use the tabs for Integration or Instant Order. None of those functions are necessary for this new Integration.
Using the Vendor Integration
When you are ready to make an order with the integration, you will simply order items through your normal channels (with your vendor representative, on their website, or over the phone / by fax). Once the order has been placed, the vendor system will communicate with the LifeSaver Software to create a Purchase Order for you automatically. For products that have never been in your system, they will be created for you via the catalog from the vendor.
The PO will display in your list of Purchase Orders and will have an asterisk in front of it to let you know it came through the automated integration, as shown below.
When the order ships to your store, you'll be notified by email. A Receiving Order will be created for you with the actual items, quantities, and costs in the order, and it will have an asterisk by it in your list of RO's. Once you receive the shipment, you can click to complete the receipt of the inventory. The final steps will be reviewing the new products (adding them to categories, etc) and printing labels, if needed.
}', 22='{type=option, value={id=3, name='faq', order=2, label='FAQ'}}', 9='{type=string, value=Integrated Ordering with E.E. Schenck}', 25='{type=number, value=0}', 26='{type=list, value=[{id=190209692545, name='Settings'}]}', 28='{type=string, value=Integrated Ordering with E.E. Schenck This article details the newest version of our integrated ordering with E.E. Schenck. This integration is as easy as we can make it! Once you use the steps below to set up, every order you make with E.E. Schenck, whether it's through their website or with one of their representative or over the phone, will automatically generate a Purchase Order for you in your LifeSaver Software system! In addition, products that are new to your system will automatically be created in this process, and they'll be highlighted for you as 'review' items so you can make sure the new products have the details they need. The integration also automates email notifications from E.E. Schenck every time they ship you an order. When that email is sent, in the system, the integration will automatically create a Receiving Order for you with the contents of the shipment. Please Note: Before you can use the integration, you will need to activate it by going to the Admin Button with your username in the upper right and go to Settings > Integrations > Vendors and toggle the switch for E.E. Schenck to Yes. Then click Save at the bottom to save your settings. Setting Up E.E. Schenck Vendor Integration 1. Log into LifeSaver Software. 2. Click on Purchasing > Vendors. 4. Click +New Vendor to create a new vendor, or click on the Vendor ID for E.E. Schenck if you've already saved them in the system. 5. On the Details tab, click on the drop-list arrow for Integration and select E.E. Schenck. The Vendor name will automatically populate. 6. Add your vendor Account Number (if you do not know it, contact your vendor for help). 7. Click on the Locations Account Info tab. 8. Enter your Vendor Account ID, even if you only have a single Location in the system. If you have multiple Locations, there will be fields for each of them. 9. Click Save to finalize your setup. Please Note: You no longer need to use the tabs for Integration or Instant Order. None of those functions are necessary for this new Integration. Using the Vendor Integration When you are ready to make an order with the integration, you will simply order items through your normal channels (with your vendor representative, on their website, or over the phone / by fax). Once the order has been placed, the vendor system will communicate with the LifeSaver Software to create a Purchase Order for you automatically. For products that have never been in your system, they will be created for you via the catalog from the vendor. The PO will display in your list of Purchase Orders and will have an asterisk in front of it to let you know it came through the automated integration, as shown below. When the order ships to your store, you'll be notified by email. A Receiving Order will be created for you with the actual items, quantities, and costs in the order, and it will have an asterisk by it in your list of RO's. Once you receive the shipment, you can click to complete the receipt of the inventory. The final steps will be reviewing the new products (adding them to categories, etc) and printing labels, if needed. Settings purchase orders integrations}'}, {id=191604258565, createdAt=1750439292568, updatedAt=1769704151299, path='integrated-ordering-with-island-batik', name='Integrated Ordering with Island Batik', 2='{type=string, value=http://rainpos.my.site.com/s/article/Integrated-Ordering-with-Island-Batik}', 4='{type=list, value=[{id=2, name='like_sew', order=1, label='Like Sew'}]}', 6='{type=string, value=
This article details the newest version of our integrated ordering with Island Batik. This newest integration is as easy as we can make it! Once you use the steps below to set up, every order you make with Island Batik, whether it's through their website or with one of their representative or over the phone, will automatically generate a Purchase Order for you in your LifeSaver Software system! In addition, products that are new to your system will automatically be created in this process, and they'll be highlighted for you as 'review' items so you can make sure the new products have the details they need.
The integration also automates email notifications from Island Batik every time they ship you an order. When that email is sent, in the system, the integration will automatically create a Receiving Order for you with the contents of the shipment.
Please Note: Before you can use the integration, you will need to activate it. Click the Admin Button with your username in the upper right and go to Settings > Integrations > Vendors and toggle the switch for Island Batik to Yes. Then click Save at the bottom to save your settings.
Setting Up Island Batik Vendor Integration
1. Log into LifeSaver Software.
2. Click on Purchasing > Vendors.
4. Click +New Vendor to create a new vendor, or click on the Vendor ID for Island Batik if you've already saved them in the system.
5. On the Details tab, click on the drop-list arrow for Integration and select Island Batik. The Vendor name will automatically populate.
6. Add your vendor Account Number (if you do not know it, contact your vendor for help).
7. Click on the Locations Account Info tab.
8. Enter your Vendor Account ID, even if you only have a single Location in the system. If you have multiple Locations, there will be fields for each of them.
9. Click Save to finalize your setup.
Please Note: You no longer need to use the tabs for Integration or Instant Order. None of those functions are necessary for this new Integration.
Using the Vendor Integration
When you are ready to make an order with the integration, you will simply order items through your normal channels (with your vendor representative, on their website, or over the phone / by fax). Once the order has been placed, the vendor system will communicate with the LifeSaver Software to create a Purchase Order for you automatically. For products that have never been in your system, they will be created for you via the catalog from the vendor.
The PO will display in your list of Purchase Orders and will have an asterisk in front of it to let you know it came through the automated integration, as shown below.
When the order ships to your store, you'll be notified by email. A Receiving Order will be created for you with the actual items, quantities, and costs in the order, and it will have an asterisk by it in your list of RO's. Once you receive the shipment, you can click to complete the receipt of the inventory. The final steps will be reviewing the new products (adding them to categories, etc) and printing labels, if needed.
}', 22='{type=option, value={id=3, name='faq', order=2, label='FAQ'}}', 9='{type=string, value=Integrated Ordering with Island Batik}', 25='{type=number, value=0}', 26='{type=list, value=[{id=190209692545, name='Settings'}]}', 28='{type=string, value=Integrated Ordering with Island Batik This article details the newest version of our integrated ordering with Island Batik. This newest integration is as easy as we can make it! Once you use the steps below to set up, every order you make with Island Batik, whether it's through their website or with one of their representative or over the phone, will automatically generate a Purchase Order for you in your LifeSaver Software system! In addition, products that are new to your system will automatically be created in this process, and they'll be highlighted for you as 'review' items so you can make sure the new products have the details they need. The integration also automates email notifications from Island Batik every time they ship you an order. When that email is sent, in the system, the integration will automatically create a Receiving Order for you with the contents of the shipment. Please Note: Before you can use the integration, you will need to activate it. Click the Admin Button with your username in the upper right and go to Settings > Integrations > Vendors and toggle the switch for Island Batik to Yes. Then click Save at the bottom to save your settings. Setting Up Island Batik Vendor Integration 1. Log into LifeSaver Software. 2. Click on Purchasing > Vendors. 4. Click +New Vendor to create a new vendor, or click on the Vendor ID for Island Batik if you've already saved them in the system. 5. On the Details tab, click on the drop-list arrow for Integration and select Island Batik. The Vendor name will automatically populate. 6. Add your vendor Account Number (if you do not know it, contact your vendor for help). 7. Click on the Locations Account Info tab. 8. Enter your Vendor Account ID, even if you only have a single Location in the system. If you have multiple Locations, there will be fields for each of them. 9. Click Save to finalize your setup. Please Note: You no longer need to use the tabs for Integration or Instant Order. None of those functions are necessary for this new Integration. Using the Vendor Integration When you are ready to make an order with the integration, you will simply order items through your normal channels (with your vendor representative, on their website, or over the phone / by fax). Once the order has been placed, the vendor system will communicate with the LifeSaver Software to create a Purchase Order for you automatically. For products that have never been in your system, they will be created for you via the catalog from the vendor. The PO will display in your list of Purchase Orders and will have an asterisk in front of it to let you know it came through the automated integration, as shown below. When the order ships to your store, you'll be notified by email. A Receiving Order will be created for you with the actual items, quantities, and costs in the order, and it will have an asterisk by it in your list of RO's. Once you receive the shipment, you can click to complete the receipt of the inventory. The final steps will be reviewing the new products (adding them to categories, etc) and printing labels, if needed. Settings purchase orders integrations}'}, {id=191604258630, createdAt=1750439292633, updatedAt=1784656339610, path='the-products-page', name='The Products Page', 2='{type=string, value=http://rainpos.my.site.com/s/article/The-Products-Page}', 35='{type=number, value=0}', 4='{type=list, value=[{id=1, name='rain_pos', order=0, label='Rain POS'}, {id=2, name='like_sew', order=1, label='Like Sew'}, {id=3, name='jewel360', order=2, label='Jewel360'}, {id=4, name='music_shop_360', order=3, label='Music Shop 360'}]}', 36='{type=number, value=1}', 37='{type=number, value=1}', 6='{type=string, value=
Find and Work With Your Products On-Screen
You can get to this part of the system by logging into the system and on the left in our Admin Toolbar, clicking Inventory > Products.
The main Products page is one of the most powerful parts of the system, and it's an area where you'll be doing a lot of your work. When you first open this page, you will see a list beginning with your most recently added items.
Here are the major features of the page:
- New Product - You can click the New Product button to manually create a product or to add a product from the catalog. You can also click the drop-list if you want to create a Kit product, or if you want to add a lot of products to your inventory at once by using the bulk add products from the catalog option.
- Bulk Actions - This area allows you to do several things with products you search for and select in the item list. Full details are below in the section on Bulk Actions.
- Item Search - Search by Title, UPC, SKU, or Manufacturer ID for products if you know specifically what you are searching for. All products with matching info will populate in the item list.
- Filters - You can use Filters to select very specific product attributes. For the full functionality, please see the section below on Filters. Once you have searched for items using the Filters list, an X button appears on the right that will allow you to clear all selected Filters.
- Select All / Select Individual Items - After you search and/or filter for the items you want, if you want to do any Bulk Actions with them, you need to check the box for each item. If you want to check all the boxes at once, or un-check all select boxes, click in the topmost box. The Select All function will do so across multiple pages, if you have that many products in your search or filter results. Once you have selected one or more items, a Clear Selection button will appear that will allow you to remove the check-boxes from all selected items, or it also has a drop-list that lets you View Selected items, which will clear from the page any items that are not selected (see image below).
- Product Options - If a product has different Options, such as colors, sizes, etc., it will have a number in blue in this area. Clicking on the number will open up a list of all of the Options. If any are Deactivated, they will have a line through the text, as pictured above.
- Product Details - This page provides the product Title (which you can click on to open the Edit Product view in a panel), the Price (which shows a range of low to high for Options that have different prices), UPC number, SKU number, and the Quantity in stock (which displays a cumulative total of items across all Locations, if you have multiple locations set up in the system. For products with Options, a total Quantity across all Options is displayed, and you expand the list of Options, and then you can see the Quantity for each one.
- Item Actions - You can either Duplicate an item by opening this drop-list, or you can Delete it. Please note that even deleted products can be searched for (in the Filters area), reopened, and if you Save them, they will become active again.
Bulk Product Actions
To work with your products in bulk without having to use a spreadsheet, here are the basic steps:
- Either Search for the products you want by product ID or keyword, or use the Filters tool to find the products with which you want to work.
- Check the boxes for the products you want, or check the topmost box to Select All.
- Click the Bulk Actions button and choose which action you want to perform.
Here are the major Bulk Actions functions:
1. Select All / Deselect All - Once you have searched or filtered for the products with which you want to work, you can click this check-box to select all of them on the current page. Once you do, a link will appear above that will let you select all items across all pages if you need.
2. Bulk Actions Button - This button will show the total number of selected products, and clicking it will drop the list of functions down for you.
3. Print Barcode Labels - Clicking this option will load all selected products into the Print Barcode Labels window, and you can work with quantities per label and see previews from there. Click here to learn more about bulk printing inventory labels (this link will open in a new tab): Products Page: Bulk Print Barcode Labels
4. Edit Products - If you open this tool, you will be able to apply bulk edits to all selected products, such as adding them to a Department, to Categories, Manufacturers, or Vendors. You can also edit prices and other key information. For full details, click here to view the Bulk Edit Products article in a new browser tab (this one will remain open).
5. Export CSV - Clicking this option will download a CSV file of the selected products that you can open in any spreadsheet program or app. Click here to learn more about Export and Import of Bulk Products (link will open in a new tab): Products Page: Bulk Import and Export Products
6. Import CSV - Clicking this option will allow you to upload product updates in bulk by spreadsheet. It's best to first Export as above the products you want to edit, then upload the adjusted CSV file.
7. Export Purchase Order - Click this option to load the selected products into a new Purchase Order. Click here to learn more about exporting products to inventory orders (this link will open in a new tab): Products Page: Export Products to Purchase Orders and Receiving Orders
8. Export Receiving Order - If you have inventory on the way from a Vendor, you can click this option to load the selected products into a new Receiving Order.
Using the Filters Tool
The Filters tool is a powerful way to find very specific groupings of products. Here is the full list of product attributes for which you can Filter:
You can filter for multiple attributes at once: For example, let's say you need to find products in your On Sale category that were created after the 15th of last month. You can use the Category drop-list to choose the On Sale category, then you can enter the Date Created near the bottom, and when you click Search, it will only give you the products created as of that date and after that are in your Sale category. You can clear your Filters by either clicking the X that comes up to the right of the Filters button, or if the Filters panel is open, you can click the Reset button at the bottom.
Please Note: There are some special filters that let you filter for products in system Integrations, such as the Reverb and Shopify filters pictured above. In the future more will be created. You'll see them automatically for integrations you have made.
}', 38='{type=number, value=1}', 39='{type=number, value=0}', 40='{type=number, value=1}', 9='{type=string, value=The Products Page}', 22='{type=option, value={id=1, name='featured_content', order=0, label='Featured Content'}}', 23='{type=list, value=[{id=1, name='featured_content', order=0, label='Featured Content'}]}', 24='{type=list, value=[{id=10, name='products', order=9, label='Products'}]}', 25='{type=number, value=0}', 26='{type=list, value=[{id=190209692537, name='Inventory'}]}', 28='{type=string, value=The Products Page Find and Work With Your Products On-Screen You can get to this part of the system by logging into the system and on the left in our Admin Toolbar, clicking Inventory > Products. The main Products page is one of the most powerful parts of the system, and it's an area where you'll be doing a lot of your work. When you first open this page, you will see a list beginning with your most recently added items. Here are the major features of the page: New Product - You can click the New Product button to manually create a product or to add a product from the catalog. You can also click the drop-list if you want to create a Kit product, or if you want to add a lot of products to your inventory at once by using the bulk add products from the catalog option. Bulk Actions - This area allows you to do several things with products you search for and select in the item list. Full details are below in the section on Bulk Actions. Item Search - Search by Title, UPC, SKU, or Manufacturer ID for products if you know specifically what you are searching for. All products with matching info will populate in the item list. Filters - You can use Filters to select very specific product attributes. For the full functionality, please see the section below on Filters. Once you have searched for items using the Filters list, an X button appears on the right that will allow you to clear all selected Filters. Select All / Select Individual Items - After you search and/or filter for the items you want, if you want to do any Bulk Actions with them, you need to check the box for each item. If you want to check all the boxes at once, or un-check all select boxes, click in the topmost box. The Select All function will do so across multiple pages, if you have that many products in your search or filter results. Once you have selected one or more items, a Clear Selection button will appear that will allow you to remove the check-boxes from all selected items, or it also has a drop-list that lets you View Selected items, which will clear from the page any items that are not selected (see image below). Product Options - If a product has different Options, such as colors, sizes, etc., it will have a number in blue in this area. Clicking on the number will open up a list of all of the Options. If any are Deactivated, they will have a line through the text, as pictured above. Product Details - This page provides the product Title (which you can click on to open the Edit Product view in a panel), the Price (which shows a range of low to high for Options that have different prices), UPC number, SKU number, and the Quantity in stock (which displays a cumulative total of items across all Locations, if you have multiple locations set up in the system. For products with Options, a total Quantity across all Options is displayed, and you expand the list of Options, and then you can see the Quantity for each one. Item Actions - You can either Duplicate an item by opening this drop-list, or you can Delete it. Please note that even deleted products can be searched for (in the Filters area), reopened, and if you Save them, they will become active again. Bulk Product Actions To work with your products in bulk without having to use a spreadsheet, here are the basic steps: Either Search for the products you want by product ID or keyword, or use the Filters tool to find the products with which you want to work. Check the boxes for the products you want, or check the topmost box to Select All. Click the Bulk Actions button and choose which action you want to perform. Here are the major Bulk Actions functions: 1. Select All / Deselect All - Once you have searched or filtered for the products with which you want to work, you can click this check-box to select all of them on the current page. Once you do, a link will appear above that will let you select all items across all pages if you need. 2. Bulk Actions Button - This button will show the total number of selected products, and clicking it will drop the list of functions down for you. 3. Print Barcode Labels - Clicking this option will load all selected products into the Print Barcode Labels window, and you can work with quantities per label and see previews from there. Click here to learn more about bulk printing inventory labels (this link will open in a new tab): Products Page: Bulk Print Barcode Labels 4. Edit Products - If you open this tool, you will be able to apply bulk edits to all selected products, such as adding them to a Department, to Categories, Manufacturers, or Vendors. You can also edit prices and other key information. For full details, click here to view the Bulk Edit Products article in a new browser tab (this one will remain open). 5. Export CSV - Clicking this option will download a CSV file of the selected products that you can open in any spreadsheet program or app. Click here to learn more about Export and Import of Bulk Products (link will open in a new tab): Products Page: Bulk Import and Export Products 6. Import CSV - Clicking this option will allow you to upload product updates in bulk by spreadsheet. It's best to first Export as above the products you want to edit, then upload the adjusted CSV file. 7. Export Purchase Order - Click this option to load the selected products into a new Purchase Order. Click here to learn more about exporting products to inventory orders (this link will open in a new tab): Products Page: Export Products to Purchase Orders and Receiving Orders 8. Export Receiving Order - If you have inventory on the way from a Vendor, you can click this option to load the selected products into a new Receiving Order. Using the Filters Tool The Filters tool is a powerful way to find very specific groupings of products. Here is the full list of product attributes for which you can Filter: You can filter for multiple attributes at once: For example, let's say you need to find products in your On Sale category that were created after the 15th of last month. You can use the Category drop-list to choose the On Sale category, then you can enter the Date Created near the bottom, and when you click Search, it will only give you the products created as of that date and after that are in your Sale category. You can clear your Filters by either clicking the X that comes up to the right of the Filters button, or if the Filters panel is open, you can click the Reset button at the bottom. Please Note: There are some special filters that let you filter for products in system Integrations, such as the Reverb and Shopify filters pictured above. In the future more will be created. You'll see them automatically for integrations you have made. Inventory products}'}, {id=191604258697, createdAt=1750439292700, updatedAt=1786029799601, path='consignment-selling-in-the-rain-system', name='Consignment Selling', 2='{type=string, value=https://rainpos.my.site.com/s/article/Consignment-Selling-in-the-LifeSaver Software-System}', 4='{type=list, value=[{id=1, name='rain_pos', order=0, label='Rain POS'}, {id=2, name='like_sew', order=1, label='Like Sew'}, {id=3, name='jewel360', order=2, label='Jewel360'}, {id=4, name='music_shop_360', order=3, label='Music Shop 360'}]}', 37='{type=number, value=0}', 6='{type=string, value=
The system allows you to check-in inventory from your consignment sellers, facilitates the sales and inventory management, and allows you to track consignment payouts. You can sell Consignment inventory out of your store and through your website. The system will track the in-store sales if you are using the Consignment product labels (see more below on this) and you'll be able to see whatever amounts are due for your consignment sellers. Online, the system will check and if a consignment item is in the cart, it will make sure to associate it with the contract. For full details on the process, see the steps below.
Configuring Your Consignments
You can configure how you will want your consignment contracts to work by going to the Admin Button (your username in the upper right) > Settings > POS Settings > Consignment.
You are able to specify your Default Payment Method you use to pay your consignment sellers. You can choose from Store Credit, Till (cash or check), Venmo, or PayPal.
If you wish to have limited-durations on your consignment contracts, you can do so by turning Contract Expiration ON and then setting the Default Length in days you want contracts to run.
For the different payout types, you can set different default percentages for Payout Defaults, for example if you want to offer a larger percentage payout for Store Credit over other types, as pictured above.
If you want to set up an automated discount on items, you can turn Discount Item ON and then set the number of Days After the contract starts that the discount would trigger, and the Discount Percent you want to offer.
You will also need to set up your Contract Template(s), if you plan to use the system-generated contracts. Click on Configure to to see the setup panel, as pictured below:
You can paste text for a contract in here, adjust terms to fit a specific contract type, and save the template. You can also use the standard automated data fields, as pictured above in red, to auto-fill items into the contract by pulling them from the Customer data. Save as many templates as you need!
If you prefer to upload pre-printed contracts at signing, the system can facilitate that as well.
Please Note: For the automated data fields in red, many more will be added in the near future.
For contracts that expire and for which the consignment seller does not reclaim the item(s), you are able to Convert Consignment Inventory to Store Inventory by turning the setting ON and setting the number of Days after the contract expires for the inventory to convert over to the store.
Be sure to Save your settings once you are finished configuring your Consignments!
Receiving Consignment Inventory
1) Go to the Register, either by clicking the Register button on the far left.
2) Load the Consignment Seller as the Customer at the top, or create a new Customer for the seller.
3) Click any of the Customer Action buttons on the right, as pictured above.
4) The Customer Actions panel will pop up on the right. You'll see Consignment in the left column near the bottom. Click the Plus Button.
5) The Consignment Contract Details panel will open and will list the customer's information at the top. For now, leave the Contract section alone and go to the Items area.
6) Add the Item(s) you are receiving from the seller. You can either search for an existing item, if it is already saved in the system, or you can click the Plus button on the right to create a new product. You can add as many items as you need.
7) If you are creating a new product, we have streamlined the creation process so that only key details are required, to save you time at the Register. Add the Product Title, Department is optional. If the item has multiple styles, such as colors and sizes, you can create those as well. If it is a serialized item, toggle Track Serial Number to ON (see example below). You can set the Condition for the item from the drop-list. If you are not yet ready to set the selling Price, you can leave it blank for now. After you complete the receiving process, you can open the product in the normal way and add full details. Click the Save Product button when you're done.
8) Once you have the item loaded, you'll see the following options. If the item was already saved in the system with an image, it will display next to the Title. You can enter the Serial Number (for non-serialized items, a Quantity field will display for how many of the items are being traded in). If you need to start a Work Order for the item, you can select the service it needs from the Work Order drop-list, and once this Trade-In is saved, the Work Order will automatically be created for you. You have the option to set a Minimum Price the seller would be willing to accept if the item isn't selling and if you need some negotiation room for customers.
9) In the Contract section (see above), you can set your Net to Consignor percentage, add Notes, and select a Contract Template from those you have saved. Click the drop-list for Upload Signed and you can choose to either Print the Contract, Email a Digital Signature, Collect a Signature on Terminal (this requires Worldpay integration and the Verifone MX-915 terminal), or No Signature. Once you have set that preference, you can click the Upload Signed button to upload the contract file and save it to the seller's account.
10) Once everything is in place, click the Create Consignment at the bottom, and the inventory will go into stock. If the item(s) are in active Work Orders, they will be listed in Reserved status, and will not be available for sale until their Work Orders are completed.
Managing Consignments and Paying Sellers
You have two key resources for working with your Consignments: The Consignment Report, and the Consignment Module.
The Consignment Report
This report can look at whatever date range and contract status you might need, and gives you a financial summary of how your consignments are performing for your sales. You can Export the data to a CSV (universal spreadsheet file) as needed. This report is found under the main Reports menu as soon as Consignment functionality is activated.
The Consignment Module
The Consignment module can be found under Modules > Consignment and will be your primary tool for managing and paying out on your consignment sales. Each item is given its own line, so for example, lines two and three above have the same Contract ID number, so they were received in the same Consignment 'batch', but in the module they are each listed separately so the items can be worked with individually for sale.
On the far right, if you click the option button at the end of a line item (three-dot stack button), you can Print a Barcode Label or Return the Item to the Consignor. Please see the note below about how necessary barcode labels are for the consignment sale process. You can filter the list you see at the top by Date Range, Consignment Status, and Store Location (if you have multiple Locations in the system). Also, each line-item has a Check-Box on the far left, allowing you to do bulk actions, such as printing barcode labels.
Please Note: For a Consignment item to register in a transaction as a consignment sale, you MUST scan the barcode produced above or from the consignment contract panel, so you will want to print barcode labels for each consignment item you sell.
Selling Items and Paying Out
You will sell consignment items through your point of sale register.
Please Note: At this time our Consignment functionality does not associate the items sold through your website with the Consignment ID, so the Payout area will not show such items as having been sold and as being eligible to be paid out.
For the Register, just be sure that your sales clerks are trained to scan the barcode printed from the Consignment module whenever they make a consignment sale. As often as you need, you can open the Consignment Module and click the Pay Consignor button. When you do, the Pay Consignors panel will open and will look something like this:
Each consignor's items that have sold and have not yet been paid out will be listed. You can see the Due to Consignor amounts for each seller. The system does not print checks to pay the consignors, you will need to do that manually using the amounts listed here, but once you have done so, you can toggle the Mark as Paid to Yes and those items will be marked as Paid.
Payouts: Setting up with PayPal and Venmo
Before being able to payout with PayPal and Venmo, you will need to set up a PayPal Business Account. This account will be used to payout with both PayPal and Venmo. It will be your responsibility to make sure that there are enough funds in the account to cover your payouts. In order to create the PayPal Business Account please click here. Next you will need to get access to PayPal Payouts. Please request access here.
After setting up your account and once your access to PayPal Payouts has been approved, you will need to save some unique credentials from the account in our system in order to connect the consignment system and PayPal for this integration. You will need the Business Account Email, your Client ID, and the Secret Key. This is accessible by logging into PayPal with your business account then going to My Apps > Credentials.
That's it! You're all set.
}', 22='{type=option, value={id=2, name='recommended_extra', order=1, label='Recommended Extra'}}', 38='{type=number, value=3}', 9='{type=string, value=Consignment Selling}', 25='{type=number, value=0}', 26='{type=list, value=[{id=190209692537, name='Inventory'}, {id=190209692541, name='Register'}, {id=190209692542, name='Modules'}, {id=190209692545, name='Settings'}, {id=190209692546, name='Reports'}]}', 28='{type=string, value=Consignment Selling The system allows you to check-in inventory from your consignment sellers, facilitates the sales and inventory management, and allows you to track consignment payouts. You can sell Consignment inventory out of your store and through your website. The system will track the in-store sales if you are using the Consignment product labels (see more below on this) and you'll be able to see whatever amounts are due for your consignment sellers. Online, the system will check and if a consignment item is in the cart, it will make sure to associate it with the contract. For full details on the process, see the steps below. Configuring Your Consignments You can configure how you will want your consignment contracts to work by going to the Admin Button (your username in the upper right) > Settings > POS Settings > Consignment. You are able to specify your Default Payment Method you use to pay your consignment sellers. You can choose from Store Credit, Till (cash or check), Venmo, or PayPal. If you wish to have limited-durations on your consignment contracts, you can do so by turning Contract Expiration ON and then setting the Default Length in days you want contracts to run. For the different payout types, you can set different default percentages for Payout Defaults, for example if you want to offer a larger percentage payout for Store Credit over other types, as pictured above. If you want to set up an automated discount on items, you can turn Discount Item ON and then set the number of Days After the contract starts that the discount would trigger, and the Discount Percent you want to offer. You will also need to set up your Contract Template(s), if you plan to use the system-generated contracts. Click on Configure to to see the setup panel, as pictured below: You can paste text for a contract in here, adjust terms to fit a specific contract type, and save the template. You can also use the standard automated data fields, as pictured above in red, to auto-fill items into the contract by pulling them from the Customer data. Save as many templates as you need! If you prefer to upload pre-printed contracts at signing, the system can facilitate that as well. Please Note: For the automated data fields in red, many more will be added in the near future. For contracts that expire and for which the consignment seller does not reclaim the item(s), you are able to Convert Consignment Inventory to Store Inventory by turning the setting ON and setting the number of Days after the contract expires for the inventory to convert over to the store. Be sure to Save your settings once you are finished configuring your Consignments! Receiving Consignment Inventory 1) Go to the Register, either by clicking the Register button on the far left. 2) Load the Consignment Seller as the Customer at the top, or create a new Customer for the seller. 3) Click any of the Customer Action buttons on the right, as pictured above. 4) The Customer Actions panel will pop up on the right. You'll see Consignment in the left column near the bottom. Click the Plus Button. 5) The Consignment Contract Details panel will open and will list the customer's information at the top. For now, leave the Contract section alone and go to the Items area. 6) Add the Item(s) you are receiving from the seller. You can either search for an existing item, if it is already saved in the system, or you can click the Plus button on the right to create a new product. You can add as many items as you need. 7) If you are creating a new product, we have streamlined the creation process so that only key details are required, to save you time at the Register. Add the Product Title, Department is optional. If the item has multiple styles, such as colors and sizes, you can create those as well. If it is a serialized item, toggle Track Serial Number to ON (see example below). You can set the Condition for the item from the drop-list. If you are not yet ready to set the selling Price, you can leave it blank for now. After you complete the receiving process, you can open the product in the normal way and add full details. Click the Save Product button when you're done. 8) Once you have the item loaded, you'll see the following options. If the item was already saved in the system with an image, it will display next to the Title. You can enter the Serial Number (for non-serialized items, a Quantity field will display for how many of the items are being traded in). If you need to start a Work Order for the item, you can select the service it needs from the Work Order drop-list, and once this Trade-In is saved, the Work Order will automatically be created for you. You have the option to set a Minimum Price the seller would be willing to accept if the item isn't selling and if you need some negotiation room for customers. 9) In the Contract section (see above), you can set your Net to Consignor percentage, add Notes, and select a Contract Template from those you have saved. Click the drop-list for Upload Signed and you can choose to either Print the Contract, Email a Digital Signature, Collect a Signature on Terminal (this requires Worldpay integration and the Verifone MX-915 terminal), or No Signature. Once you have set that preference, you can click the Upload Signed button to upload the contract file and save it to the seller's account. 10) Once everything is in place, click the Create Consignment at the bottom, and the inventory will go into stock. If the item(s) are in active Work Orders, they will be listed in Reserved status, and will not be available for sale until their Work Orders are completed. Managing Consignments and Paying Sellers You have two key resources for working with your Consignments: The Consignment Report, and the Consignment Module. The Consignment Report This report can look at whatever date range and contract status you might need, and gives you a financial summary of how your consignments are performing for your sales. You can Export the data to a CSV (universal spreadsheet file) as needed. This report is found under the main Reports menu as soon as Consignment functionality is activated. The Consignment Module The Consignment module can be found under Modules > Consignment and will be your primary tool for managing and paying out on your consignment sales. Each item is given its own line, so for example, lines two and three above have the same Contract ID number, so they were received in the same Consignment 'batch', but in the module they are each listed separately so the items can be worked with individually for sale. On the far right, if you click the option button at the end of a line item (three-dot stack button), you can Print a Barcode Label or Return the Item to the Consignor. Please see the note below about how necessary barcode labels are for the consignment sale process. You can filter the list you see at the top by Date Range, Consignment Status, and Store Location (if you have multiple Locations in the system). Also, each line-item has a Check-Box on the far left, allowing you to do bulk actions, such as printing barcode labels. Please Note: For a Consignment item to register in a transaction as a consignment sale, you MUST scan the barcode produced above or from the consignment contract panel, so you will want to print barcode labels for each consignment item you sell. Selling Items and Paying Out You will sell consignment items through your point of sale register. Please note that at this time our Consignment functionality does not associate the items sold through your website with the Consignment ID, so the Payout area will not show such items as having been sold and as being eligible to be paid out. For the Register, just be sure that your sales clerks are trained to scan the barcode printed from the Consignment module whenever they make a consignment sale. As often as you need, you can open the Consignment Module and click the Pay Consignor button. When you do, the Pay Consignors panel will open and will look something like this: Each consignor's items that have sold and have not yet been paid out will be listed. You can see the Due to Consignor amounts for each seller. The system does not print checks to pay the consignors, you will need to do that manually using the amounts listed here, but once you have done so, you can toggle the Mark as Paid to Yes and those items will be marked as Paid. Payouts: Setting up with PayPal and Venmo Before being able to payout with PayPal and Venmo, you will need to set up a PayPal Business Account. This account will be used to payout with both PayPal and Venmo. It will be your responsibility to make sure that there are enough funds in the account to cover your payouts. In order to create the PayPal Business Account please click here. Next you will need to get access to PayPal Payouts. Please request access here. After setting up your account and once your access to PayPal Payouts has been approved, you will need to save some unique credentials from the account in our system in order to connect the consignment system and PayPal for this integration. You will need the Business Account Email, your Client ID, and the Secret Key. This is accessible by logging into PayPal with your business account then going to My Apps > Credentials. That's it! You're all set. Inventory,Register,Modules,Settings,Reports administrative pos settings}'}, {id=191604258702, createdAt=1750439292705, updatedAt=1780439304777, path='creating-and-managing-custom-labels', name='Creating and Managing Custom Labels', 32='{type=number, value=2}', 2='{type=string, value=https://rainpos.my.site.com/s/article/Creating-and-Managing-Custom-Labels}', 4='{type=list, value=[{id=1, name='rain_pos', order=0, label='Rain POS'}, {id=2, name='like_sew', order=1, label='Like Sew'}, {id=3, name='jewel360', order=2, label='Jewel360'}, {id=4, name='music_shop_360', order=3, label='Music Shop 360'}]}', 37='{type=number, value=0}', 6='{type=string, value=
We offer the ability for you to greatly customize labels you print for items in the system. You can get to this part of the system by going to Settings > Printing > Custom Labels. Please note, when you have this feature on, it replaces the previous settings in the POS Settings > General tab in the section for Barcode Labels, so you will no longer see or need that section since the options available to you in this new tool are much more highly customizable.
When you click the Create New button, you can choose the label size you wish to customize:
We offer standard label-roll printing sizes of 2.25" x 1.25", 2.25" x .75", 1" x 1", Long Tail, Dumbbell 2-Up (Dymo only), and Dumbbell 1-Up. We hope to add more in the future, but these are the sizes we offer now. When you click on the box to choose the label type, you'll see the following customization window.
- You will need to add a unique Name for your custom label in order to save it. Labels are shared across locations if you have a multi-location store.
- Click the +Add Label Details button if you want to add more types of data to your custom label, see the image below for the full list of things you can add.
- By default, the Barcode, Company Name, Price, Product Title, and Variant (if any) of the item are in place for your label, with placeholder information displaying in the preview on the right. You can use the Remove buttons ( -) if you don't need an item listed. You can click on any of them to configure how they appear on the label (see the section below about Adjusting and Styling Your Labels for more details).
- The Label Preview will display placeholder information in the size and style each item is configured and will update as you make changes. This area is more than just a preview: you can drag and drop data items around the layout and position them wherever there is available space. You can also click and drag on the border of an element to reduce or increase its available space on the label. See the section below on Adjusting and Styling Your Labels for further details on how this works.
- After you click on one of the data elements in the label, either in the button sidebar or on the preview, the Customization Area will show you options on how you can resize, format, and reposition items. There are videos about each of the major data types you can add in the sections below that show you how to configure each. For example, the section on Data Elements You Can Add to Your Labels starts with Manufacturer ID, UPC, and SKU and shows you how you can work with those codes.
- If you are configuring a data element as described above in #5, if you need to, you can click to Reset it and the configuration will revert to default settings for you.
- When you've made all the adjustments you need for your custom label, you can click the Save button and it will be saved in a list for you. You can reopen saved labels to further configure them if needed. If you don't have any changes that need to be saved, click Cancel to close the window.
Creating and Managing Custom Labels
- You can create as many custom labels as you wish.
- Label names must be unique.
- You can edit and delete existing labels.
- They are shared between locations if you have multiple locations in the system.
Adjusting And Styling Your Labels - The Basics
- You can adjust the font size bigger and smaller.
- You can align the text left, center, and right.
- You can choose to bold the text.
- You can add and remove various data points so only the info you want is included on the label.
- You can click and drag to adjust the max width for your label detail fields to handle the various lengths of data for products such as Product Title.
- We display a warning when your label detail fields overlap and we recommend adjusting them so they don’t overlap before saving (but you can save when they are overlapping). Fields in this state appear in red.
Label Defaults - Learn About the Default Label Details
-
Defaults- When you create a new custom label, we will display default label data and formatting. You can customize whatever you wish, but the video works with the data that is included by default, what it means, and how you can customize it.
-
Price- Select which price you would like to be printed on your labels. By default, the regular Price will display. If you also choose to display a Sale Price and if one is present, it will appear with the regular price crossed out and the Sale Price featured. Also, prices you enter are just for you to test various prices, when you print it will use whatever is actually saved in each product. If you choose to not show decimals, we will round up to the nearest dollar, so if you don’t have a whole dollar amount for your products, we recommend you show decimals.
-
Company Name - this will always be displayed as your company name as it appears on the first panel of the system Settings area and cannot be changed.
-
UPC and Other Identifiers - Choose the priority of which data will display:
- Primary Option (default)
- Secondary Option (if primary is not configured)
- Tertiary Option (if secondary is not configured)
- Internal Product Option ID (if none of the above exist)
Also, for label sizes 1"x1", Dumbbell 1up, Dumbbell 2up (Dymo) and Long Tail, the barcode will actually be an internal number to save space, but it will always be able to pull up the product when scanned. The number below the barcode will always follow the logic you set up for the custom label (so even if the barcode is an internal ID, the value that displays under it will be the UPC, MFR ID, etc.)
- Product Title - You can choose to allow up to 2 rows if you typically have longer product titles, or you can keep it to 1 line if you only need to reserve enough space for 1 line. You can choose to have it print a product’s alt barcode title where available, which is what we recommend. If for whatever reason you want to ignore any alt barcode titles and only print the product title, then uncheck the box
- Variants & Options - You can choose whether or not you want the variant to display. Here’s what’s in the tooltip If you have more than one variation type such as size and color, they will be printed one after another on the same line. For Example: with variations "Size: 4; Color: Gold" or without variants "4; Gold"
Data Elements You Can Add to Your Labels
MFR Number, SKU, and UPC
If you have a barcode in your custom label template, then UPC, SKU, or Manufacturer Number will already be included directly under the barcode. We only recommend adding this data type separately if you are not including a barcode in your custom label template. Otherwise, you may have duplicated content printed.
Serial Number and Condition
- With the. new printing flow, you will be able to select which inventory you want to print so now we can include serial numbers and their conditions on the printed labels.
- The Serial Number field in the editor allows you to try out sample serial number lengths to make sure the area is wide enough to fit all the data.
- The Condition dropdown lists all condition types, so you can test the conditions you use and make sure they fit in the allotted space.
- If you have serialized conditions, the serial number’s condition will be printed. If you don’t have any serialized conditions, it will use the non-serial condition for a product.
Current Date and Date Added
- Both date options allow you to select what type of formatting will be used to display the date.
- Current Date will always be the date when you are printing the label.
- Date Added - you can select which inventory you would like to print for a product, so whatever inventory you select, the date that inventory was added is what will print for this label detail.
Bin Locations and Vendor
- Bin Locations - we decided to only include a very basic example of a 2 level bin location because they are so customizable and can drastically vary between stores. But if Bin Location is added to your custom label, it will print the bin location for that product if there is one. If there is no bin location it will be blank. Note - only bin locations. marked as Public will be displayed on the label.
- Vendor- this will print the primary vendor for the product if there is one. If there is not one it will be blank. You can sample different vendor names to make sure the allotted width is enough.
Item Costs
- Costs can be included on labels, and they will be encoded so it’s not obvious to your customers that it’s a cost.
- You can set up your Encoding Map in the Custom Labels setting page and going to Settings. We will default the encoding map to BLACKHORSE. but it can be changed to whatever you wish.
- The Prefix and Suffix are optional. These will be universal so every single cost that gets printed, even though each product’s cost can be unique, the prefix and suffix will be the same on every label. This helps you make the cost even more encoded because it won’t be a normal length but it’s easy for you and your sales reps to know where the cost actually begins and ends.
- When you configure the Cost field in your custom label, you can test out different cost amounts and see how they will translate onto your label. It will use whatever you’ve configured in the Encoding Map. You can also choose to show decimals or not for this value.
Inventory Type
- Configure what you want to display for specific Inventory Types on the Custom Labels settings page and going to Settings and clicking on Inventory Type. You can make these whatever you want, or you can even choose to leave some blank. A common practice is to leave store inventory blank and only configure special codes to display for Vendor Consignment (Memo) and Consignment inventory.
- When you add inventory type to the custom label, you can switch your view between the different inventory types to see what it will look like when each inventory type is printed. This is just for display purposes, whatever inventory type ends up being your final selection is what will be printed on the label.
General Printing Flow
This video gives an overview of the process of printing a custom label.
Dumbbell Labels (1up and 2up)
These labels have 2 printable areas, the left side and the right side, while the middle is not a printable area. Because of this, dumbbell labels have an extra tool to allow you to select which side a label detail should go on. L represents the left side, and R represents the right side.
}', 38='{type=number, value=2}', 39='{type=number, value=0}', 40='{type=number, value=1}', 9='{type=string, value=Creating and Managing Custom Labels}', 22='{type=option, value={id=2, name='recommended_extra', order=1, label='Recommended Extra'}}', 25='{type=number, value=0}', 26='{type=list, value=[{id=190209692537, name='Inventory'}, {id=190209692545, name='Settings'}]}', 28='{type=string, value=Creating and Managing Custom Labels We offer the ability for you to greatly customize labels you print for items in the system. You can get to this part of the system by going to Settings > Printing > Custom Labels. Please note, when you have this feature on, it replaces the previous settings in the POS Settings > General tab in the section for Barcode Labels, so you will no longer see or need that section since the options available to you in this new tool are much more highly customizable. When you click the Create New button, you can choose the label size you wish to customize: We offer standard label-roll printing sizes of 2.25" x 1.25", 2.25" x .75", 1" x 1", Long Tail, Dumbbell 2-Up (Dymo only), and Dumbbell 1-Up. We hope to add more in the future, but these are the sizes we offer now. When you click on the box to choose the label type, you'll see the following customization window. You will need to add a unique Name for your custom label in order to save it. Labels are shared across locations if you have a multi-location store. Click the +Add Label Details button if you want to add more types of data to your custom label, see the image below for the full list of things you can add. By default, the Barcode, Company Name, Price, Product Title, and Variant (if any) of the item are in place for your label, with placeholder information displaying in the preview on the right. You can use the Remove buttons ( -) if you don't need an item listed. You can click on any of them to configure how they appear on the label (see the section below about Adjusting and Styling Your Labels for more details). The Label Preview will display placeholder information in the size and style each item is configured and will update as you make changes. This area is more than just a preview: you can drag and drop data items around the layout and position them wherever there is available space. You can also click and drag on the border of an element to reduce or increase its available space on the label. See the section below on Adjusting and Styling Your Labels for further details on how this works. After you click on one of the data elements in the label, either in the button sidebar or on the preview, the Customization Area will show you options on how you can resize, format, and reposition items. There are videos about each of the major data types you can add in the sections below that show you how to configure each. For example, the section on Data Elements You Can Add to Your Labels starts with Manufacturer ID, UPC, and SKU and shows you how you can work with those codes. If you are configuring a data element as described above in #5, if you need to, you can click to Reset it and the configuration will revert to default settings for you. When you've made all the adjustments you need for your custom label, you can click the Save button and it will be saved in a list for you. You can reopen saved labels to further configure them if needed. If you don't have any changes that need to be saved, click Cancel to close the window. Creating and Managing Custom Labels You can create as many custom labels as you wish. Label names must be unique. You can edit and delete existing labels. They are shared between locations if you have multiple locations in the system. Adjusting And Styling your Labels - The Basics You can adjust the font size bigger and smaller. You can align the text left, center, and right. You can choose to bold the text. You can add and remove various data points so only the info you want is included on the label. You can click and drag to adjust the max width for your label detail fields to handle the various lengths of data for products such as Product Title. We display a warning when your label detail fields overlap and we recommend adjusting them so they don’t overlap before saving (but you can save when they are overlapping). Fields in this state appear in red. Label Defaults - Learn About the Default Label Details Defaults- When you create a new custom label, we will display default label data and formatting. You can customize whatever you wish, but the video works with the data that is included by default, what it means, and how you can customize it. Price- Select which price you would like to be printed on your labels. By default, the regular Price will display. If you also choose to display a Sale Price and if one is present, it will appear with the regular price crossed out and the Sale Price featured. Also, prices you enter are just for you to test various prices, when you print it will use whatever is actually saved in each product. If you choose to not show decimals, we will round up to the nearest dollar, so if you don’t have a whole dollar amount for your products, we recommend you show decimals. Company Name - this will always be displayed as your company name as it appears on the first panel of the system Settings area and cannot be changed. UPC and Other Identifiers - Choose the priority of which data will display: Primary Option (default) Secondary Option (if primary is not configured) Tertiary Option (if secondary is not configured) Internal Product Option ID (if none of the above exist) Also, for label sizes 1"x1", Dumbbell 1up, Dumbbell 2up (Dymo) and Long Tail, the barcode will actually be an internal number to save space, but it will always be able to pull up the product when scanned. The number below the barcode will always follow the logic you set up for the custom label (so even if the barcode is an internal ID, the value that displays under it will be the UPC, MFR ID, etc.) Product Title - You can choose to allow up to 2 rows if you typically have longer product titles, or you can keep it to 1 line if you only need to reserve enough space for 1 line. You can choose to have it print a product’s alt barcode title where available, which is what we recommend. If for whatever reason you want to ignore any alt barcode titles and only print the product title, then uncheck the box Variants & Options - You can choose whether or not you want the variant to display. Here’s what’s in the tooltip If you have more than one variation type such as size and color, they will be printed one after another on the same line. For Example: with variations "Size: 4; Color: Gold" or without variants "4; Gold" Data Elements You Can Add to Your Labels MFR Number, SKU, and UPC If you have a barcode in your custom label template, then UPC, SKU, or Manufacturer Number will already be included directly under the barcode. We only recommend adding this data type separately if you are not including a barcode in your custom label template. Otherwise, you may have duplicated content printed. Serial Number and Condition With the. new printing flow, you will be able to select which inventory you want to print so now we can include serial numbers and their conditions on the printed labels. The Serial Number field in the editor allows you to try out sample serial number lengths to make sure the area is wide enough to fit all the data. The Condition dropdown lists all condition types, so you can test the conditions you use and make sure they fit in the allotted space. If you have serialized conditions, the serial number’s condition will be printed. If you don’t have any serialized conditions, it will use the non-serial condition for a product. Current Date and Date Added Both date options allow you to select what type of formatting will be used to display the date. Current Date will always be the date when you are printing the label. Date Added - you can select which inventory you would like to print for a product, so whatever inventory you select, the date that inventory was added is what will print for this label detail. Bin Locations and Vendor Bin Locations - we decided to only include a very basic example of a 2 level bin location because they are so customizable and can drastically vary between stores. But if Bin Location is added to your custom label, it will print the bin location for that product if there is one. If there is no bin location it will be blank. Note - only bin locations. marked as Public will be displayed on the label. Vendor- this will print the primary vendor for the product if there is one. If there is not one it will be blank. You can sample different vendor names to make sure the allotted width is enough. Item Costs Costs can be included on labels, and they will be encoded so it’s not obvious to your customers that it’s a cost. You can set up your Encoding Map in the Custom Labels setting page and going to Settings. We will default the encoding map to BLACKHORSE. but it can be changed to whatever you wish. The Prefix and Suffix are optional. These will be universal so every single cost that gets printed, even though each product’s cost can be unique, the prefix and suffix will be the same on every label. This helps you make the cost even more encoded because it won’t be a normal length but it’s easy for you and your sales reps to know where the cost actually begins and ends. When you configure the Cost field in your custom label, you can test out different cost amounts and see how they will translate onto your label. It will use whatever you’ve configured in the Encoding Map. You can also choose to show decimals or not for this value. Inventory Type Configure what you want to display for specific Inventory Types on the Custom Labels settings page and going to Settings and clicking on Inventory Type. You can make these whatever you want, or you can even choose to leave some blank. A common practice is to leave store inventory blank and only configure special codes to display for Vendor Consignment (Memo) and Consignment inventory. When you add inventory type to the custom label, you can switch your view between the different inventory types to see what it will look like when each inventory type is printed. This is just for display purposes, whatever inventory type ends up being your final selection is what will be printed on the label. General Printing Flow This video gives an overview of the process of printing a custom label. Dumbbell Labels (1up and 2up) These labels have 2 printable areas, the left side and the right side, while the middle is not a printable area. Because of this, dumbbell labels have an extra tool to allow you to select which side a label detail should go on. L represents the left side, and R represents the right side. Inventory,Settings add edit product page products printing}', 31='{type=number, value=1}'}, {id=191604258707, createdAt=1750439292710, updatedAt=1769704580629, path='custom-form-styles-customize-your-documents', name='Custom Form Styles - Customize Your Documents', 32='{type=number, value=1}', 2='{type=string, value=https://rainpos.my.site.com/s/article/Custom-Form-Styles-Customize-Your-Documents}', 4='{type=list, value=[{id=1, name='rain_pos', order=0, label='Rain POS'}, {id=2, name='like_sew', order=1, label='Like Sew'}, {id=3, name='jewel360', order=2, label='Jewel360'}, {id=4, name='music_shop_360', order=3, label='Music Shop 360'}]}', 6='{type=string, value=
The Form Styles module allows you to customize different types of documents you print from the system. The list of documents you can customize for letter-size page printing includes:
- Invoices
- Receipts
- Quotes
- Account Statements
- Purchase Orders / Receiving Orders
- Work Orders
- Trial Purchases*
* Trial Purchases is a feature that allows your trusted customers to take home and try out an item for a while, and if it meets their approval they can complete the purchase, if not, they can return it.
You can get to this part of the system by hovering over Modules on the far-left and clicking on Form Styles.
Please Note: If you have multiple Locations set up in the system, your forms will automatically use the correct address information for whatever Location you are working with in this module. You can also customize form content specifically by Location if your different stores have different priorities on the content used. For example, if one of your stores uses a Fax number, but the other doesn't, it can display the Fax number while the other location might only need to list Phone and Email.
Your Form Styles List Page
As you create customized forms for use in the system, you will build a list of different forms you have configured, as pictured below. You might have multiple versions of a certain form, such as an Invoice, for different uses. Please note that with the Action button on the right side of each item, you are able to set which form is currently the Default version of the form that the system will use when you go to print a document of that type.
From the list page, you are able to filter your view to specific keywords in the Search field, a specific Type of document or All Types from the drop-list on the right, and if you have multiple store Locations, you will have a drop-list to view one or all of them, as needed. To use a Form Style, you need to set it as the Default of that document type, otherwise those documents will print in the original system style. You can click on the Name of a form to view and edit the content.
Create a Custom Form
In the upper right, click on the New Form Style button. You'll be given a drop-list of the different forms you can customize.
All forms listed will print on Letter size paper. Let's use an Invoice as an example:
In the initial view, you will be on the Design tab. You are able to make a Form Style Name to uniquely identify the custom form, and whatever you enter here is the internal name you will see for the form in your list of Form Styles. If you have multiple Locations, you can apply this form to the one you want using the Store Location drop-list. There are several forms that offer either standard Portrait layout, where it prints a full upright page, or also Landscape layout that prints two smaller pages side by side. The right-side copy will be a Store Copy that will include Private Notes in the case of Receipts or Internal Comments in the case of Work Orders. You can choose which you prefer from the Layout drop-list. The documents that offer this Landscape print option are Invoices, Receipts, and Work Orders. See the example below for a Landscape Work Order. You can also add your logo to the form by clicking the Choose File button in the Upload Logo area.
On the right side you will see a preview of the current configuration of the form. You can either click on any of the visible Blue Pencil icons to customize the content of that area, or you can click on the Content tab in the upper left and work from there.
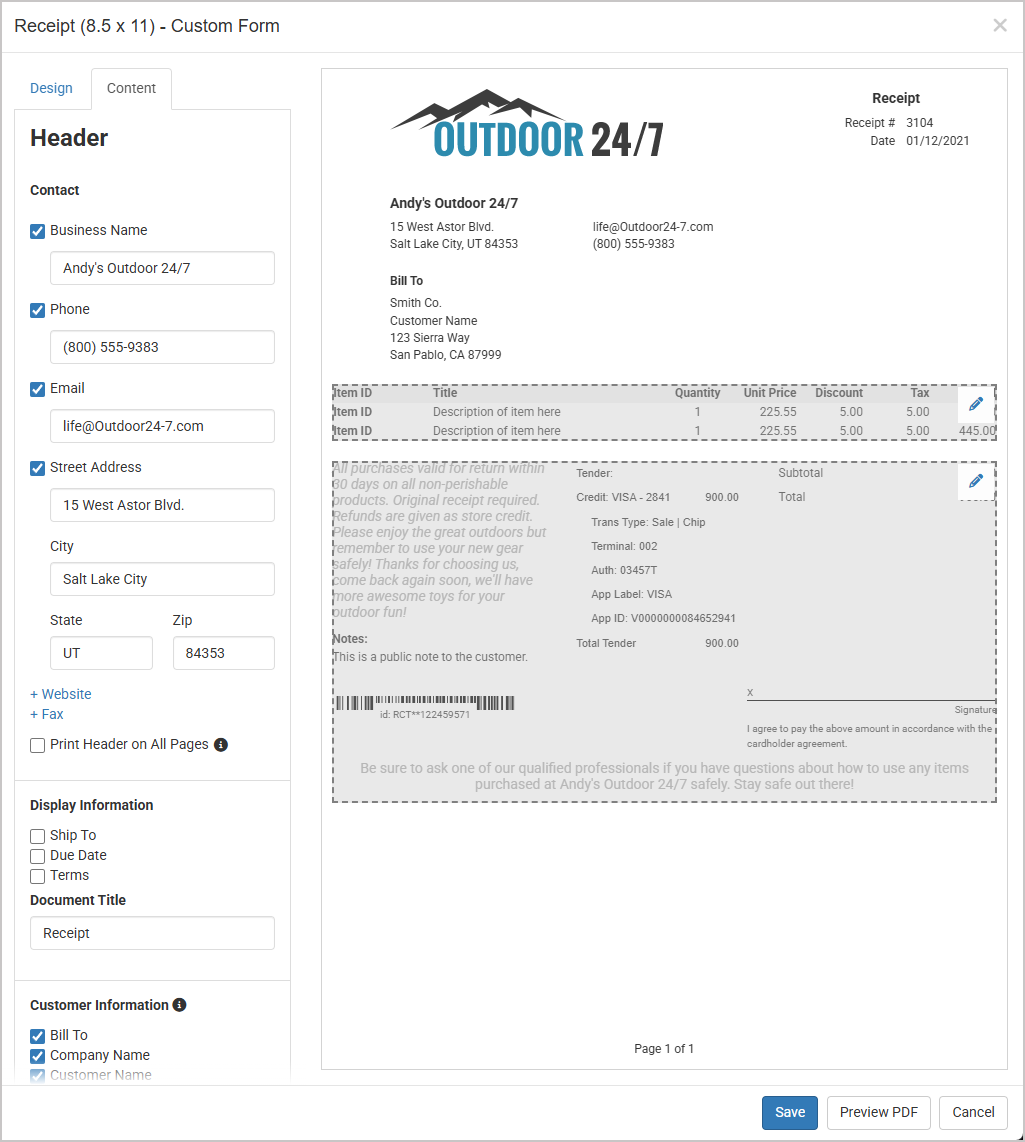
For each editable area, starting with the Header at the top of the page, you will be able to adjust available content to display what you need. Use the checkboxes and links on the left to configure the content you want to show. Please note, the Receipt type of Form Style also allows you to Print the Header on All Pages, as pictured above. If you have that box checked but none of the Contact boxes above checked, you will still see blank spaces at the top of your pages. This is useful if you have letterhead with your logo and info at the top of the page since pages will leave a blank space for the header. Once you have configured everything you want, click to Save your custom document at the bottom.
As you create different custom forms, the first version of each that you create is something you need to manually set as the Default of that type so the system will use it. If you do not set a Default for a document type, the system won't use the Form Style when printing. You can change any other versions you create to be defaults by clicking the Ellipsis Button (the stack of three dots) on the far right. Initially, you will only see the options to Edit or Delete the form. Once you have more than one version of a document type, e.g. an Invoice, you will also have the option of making a non-default version the Default.
Working with Table Configurations
Please Note: Some Form Style document types have Tables that are completely editable. For example, if you look at the middle section of the Invoice document above, you see a small table with several headers and information about the items being purchased in the invoice. If we click to edit that section, we'll see something like the image below.
You can drag and drop the columns into whatever order makes the most sense to you. You can also click to Edit Labels of the column headers, and that will open this window where you can configure the table itself:
If there is a column you feel you don't need, you can un-check the Checkbox for that item. Where it says Display As, you can change the text for the column header. For example, you could change Ext Price to Item Subtotal, if you like. Lastly, you can adjust the Width of each column in the table. These numbers always need to add up to 100, so each column is a percent value of 100. This is useful if you have some areas that are longer than others like especially long Descriptions. Once you have this configured the way you want, click Save, and those table changes will be ready to save with the full document at the bottom of the window whenever you're ready.
Printing Your Form Styles
When you are using the system and you go to print a document of a type for which you have created a Custom Form Style, the system will use whichever document is the Default to print, meaning you will not be offered a choice of customized documents to print. Be sure to change the Default to the customized form you need before you go to print it.
IMPORTANT: If you create a Receipt document and set it as the Default receipt for one of your Locations, or if you only have one location, the system will print ALL of your receipts moving forward at Letter size unless you check a box at the time of printing to Print Thermal Receipt (pictured below). For Receipts in your Custom Form Styles, you will only want to do this if you want by default to print to Letter size paper.
}', 22='{type=option, value={id=1, name='featured_content', order=0, label='Featured Content'}}', 39='{type=number, value=0}', 40='{type=number, value=1}', 9='{type=string, value=Custom Form Styles - Customize Your Documents}', 25='{type=number, value=0}', 26='{type=list, value=[{id=190209692542, name='Modules'}, {id=190209692543, name='Purchasing'}]}', 28='{type=string, value=Custom Form Styles - Customize Your Documents The Form Styles module allows you to customize different types of documents you print from the system. The list of documents you can customize for letter-size page printing includes: Invoices Receipts Quotes Account Statements Purchase Orders / Receiving Orders Work Orders Trial Purchases* * Trial Purchases is a feature that allows your trusted customers to take home and try out an item for a while, and if it meets their approval they can complete the purchase, if not, they can return it. You can get to this part of the system by hovering over Modules on the far-left and clicking on Form Styles. Please Note: If you have multiple Locations set up in the system, your forms will automatically use the correct address information for whatever Location you are working with in this module. You can also customize form content specifically by Location if your different stores have different priorities on the content used. For example, if one of your stores uses a Fax number, but the other doesn't, it can display the Fax number while the other location might only need to list Phone and Email. Your Form Styles List Page As you create customized forms for use in the system, you will build a list of different forms you have configured, as pictured below. You might have multiple versions of a certain form, such as an Invoice, for different uses. Please note that with the Action button on the right side of each item, you are able to set which form is currently the Default version of the form that the system will use when you go to print a document of that type. From the list page, you are able to filter your view to specific keywords in the Search field, a specific Type of document or All Types from the drop-list on the right, and if you have multiple store Locations, you will have a drop-list to view one or all of them, as needed. To use a Form Style, you need to set it as the Default of that document type, otherwise those documents will print in the original system style. You can click on the Name of a form to view and edit the content. Create a Custom Form In the upper right, click on the New Form Style button. You'll be given a drop-list of the different forms you can customize. All forms listed will print on Letter size paper. Let's use an Invoice as an example: In the initial view, you will be on the Design tab. You are able to make a Form Style Name to uniquely identify the custom form, and whatever you enter here is the internal name you will see for the form in your list of Form Styles. If you have multiple Locations, you can apply this form to the one you want using the Store Location drop-list. There are several forms that offer either standard Portrait layout, where it prints a full upright page, or also Landscape layout that prints two smaller pages side by side. The right-side copy will be a Store Copy that will include Private Notes in the case of Receipts or Internal Comments in the case of Work Orders. You can choose which you prefer from the Layout drop-list. The documents that offer this Landscape print option are Invoices, Receipts, and Work Orders. See the example below for a Landscape Work Order. You can also add your logo to the form by clicking the Choose File button in the Upload Logo area. On the right side you will see a preview of the current configuration of the form. You can either click on any of the visible Blue Pencil icons to customize the content of that area, or you can click on the Content tab in the upper left and work from there. For each editable area, starting with the Header at the top of the page, you will be able to adjust available content to display what you need. Use the checkboxes and links on the left to configure the content you want to show. Once you have configured everything you want, click to Save your custom document at the bottom. As you create different custom forms, the first version of each that you create is something you need to manually set as the Default of that type so the system will use it. If you do not set a Default for a document type, the system won't use the Form Style when printing. You can change any other versions you create to be defaults by clicking the Ellipsis Button (the stack of three dots) on the far right. Initially, you will only see the options to Edit or Delete the form. Once you have more than one version of a document type, e.g. an Invoice, you will also have the option of making a non-default version the Default. Working with Table Configurations Please Note: Some Form Style document types have Tables that are completely editable. For example, if you look at the middle section of the Invoice document above, you see a small table with several headers and information about the items being purchased in the invoice. If we click to edit that section, we'll see something like the image below. You can drag and drop the columns into whatever order makes the most sense to you. You can also click to Edit Labels of the column headers, and that will open this window where you can configure the table itself: If there is a column you feel you don't need, you can un-check the Checkbox for that item. Where it says Display As, you can change the text for the column header. For example, you could change Ext Price to Item Subtotal, if you like. Lastly, you can adjust the Width of each column in the table. These numbers always need to add up to 100, so each column is a percent value of 100. This is useful if you have some areas that are longer than others like especially long Descriptions. Once you have this configured the way you want, click Save, and those table changes will be ready to save with the full document at the bottom of the window whenever you're ready. Printing Your Form Styles When you are using the system and you go to print a document of a type for which you have created a Custom Form Style, the system will use whichever document is the Default to print, meaning you will not be offered a choice of customized documents to print. Be sure to change the Default to the customized form you need before you go to print it. IMPORTANT: If you create a Receipt document and set it as the Default receipt for one of your Locations, or if you only have one location, the system will print ALL of your receipts moving forward at Letter size unless you check a box at the time of printing to Print Thermal Receipt (pictured below). For Receipts in your Custom Form Styles, you will only want to do this if you want by default to print to Letter size paper. Modules,Purchasing form styles invoices work orders customers printing}', 31='{type=number, value=0}'}, {id=191604258712, createdAt=1750439292715, updatedAt=1787331588637, path='direct-label-printing-with-zpl', name='Direct Label Printing With ZPL', 32='{type=number, value=3}', 2='{type=string, value=https://rainpos.my.site.com/s/article/Direct-Label-Printing-With-ZPL}', 35='{type=number, value=0}', 4='{type=list, value=[{id=1, name='rain_pos', order=0, label='Rain POS'}, {id=2, name='like_sew', order=1, label='Like Sew'}, {id=3, name='jewel360', order=2, label='Jewel360'}, {id=4, name='music_shop_360', order=3, label='Music Shop 360'}]}', 36='{type=number, value=1}', 37='{type=number, value=0}', 6='{type=string, value=
As part of the new printer management functionality, we have set up an area under Settings > Printing called Direct ZPL Printing that will allow you to work directly with ZPL-language printers.
Manage Printers Setting
The purpose of this area is to connect from the browser directly to your printer.
Note - This will only work for printers that support ZPL language such as Zebra or GoDex. Dymo printers do NOT support ZPL.
Below are the functions on the Manage Printers tab:
Download Print Proxy
- This is a very small piece of software that will run in the background. It must be on in order for us to communicate directly to the printer.
- By default it will run automatically any time the computer is powered on, but if you find this isn’t happening, check the documentation for your operating system on how to set it to run automatically.
Add Printer
- Select from a list of available printers or enter the IP Address and Port.
- A printer must be assigned to a specific Location.
- You can name your printer if you’d like it to be different than the default name.
- ZPL uses units of “Dots Per Inch” or DPI, and right now the only supported DPI density is 203 DPI.
- You can offset the top and left margins by a specified number of dots. This can be a positive or negative number.
- You can also increase or decrease the darkness of the print (note - this may vary by printer).
Manage Printers
- You can manage any existing printers by clicking on the 3 dots to the right of the printer name.
- You can edit a printer which will allow you to change anything you configured when you added the printer.
- You can “Set as Default” which will auto-select the printer whenever you are printing from the same location as the printer. Only one printer per location can be set as the default. You can also “Remove Default” for any printer that is currently set as the default.
- You can delete a printer, but please be careful as this will remove the printer for all users and will have to be re-configured if you want to use it in the future.
How to Bypass the Browser and Print Directly to the Printer using ZPL
- If you have at least one printer configured for your location, then when you open the barcode printing modal, you will see the status if your print proxy (online or offline) and you will be able to select a printer and view the connection status (ready to print or offline).
- In order to bypass the browser and print directly to the printer using ZPL, the print proxy must be Online, and you must select a printer that has a status of “ready to print”.
- If the print proxy and/or the printer is offline, then the labels will be printed through your browser.
}', 38='{type=number, value=1}', 39='{type=number, value=1}', 40='{type=number, value=0}', 9='{type=string, value=Direct Label Printing With ZPL}', 22='{type=option, value={id=2, name='recommended_extra', order=1, label='Recommended Extra'}}', 25='{type=number, value=0}', 26='{type=list, value=[{id=190209692545, name='Settings'}, {id=190209692688, name='Getting Started'}]}', 28='{type=string, value=Direct Label Printing With ZPL As part of the new printer management functionality, we have set up an area under Settings > Printing called Direct ZPL Printing that will allow you to work directly with ZPL-language printers. Manage Printers Setting The purpose of this area is to connect from the browser directly to your printer. Note - This will only work for printers that support ZPL language such as Zebra or GoDex. Dymo printers do NOT support ZPL. Below are the functions on the Manage Printers tab: Download Print Proxy This is a very small piece of software that will run in the background. It must be on in order for us to communicate directly to the printer. By default it will run automatically any time the computer is powered on, but if you find this isn’t happening, check the documentation for your operating system on how to set it to run automatically. Add Printer Select from a list of available printers or enter the IP Address and Port. A printer must be assigned to a specific Location. You can name your printer if you’d like it to be different than the default name. ZPL uses units of “Dots Per Inch” or DPI, and right now the only supported DPI density is 203 DPI. You can offset the top and left margins by a specified number of dots. This can be a positive or negative number. You can also increase or decrease the darkness of the print (note - this may vary by printer). Manage Printers You can manage any existing printers by clicking on the 3 dots to the right of the printer name. You can edit a printer which will allow you to change anything you configured when you added the printer. You can “Set as Default” which will auto-select the printer whenever you are printing from the same location as the printer. Only one printer per location can be set as the default. You can also “Remove Default” for any printer that is currently set as the default. You can delete a printer, but please be careful as this will remove the printer for all users and will have to be re-configured if you want to use it in the future. How to Bypass the Browser and Print Directly to the Printer using ZPL If you have at least one printer configured for your location, then when you open the barcode printing modal, you will see the status if your print proxy (online or offline) and you will be able to select a printer and view the connection status (ready to print or offline). In order to bypass the browser and print directly to the printer using ZPL, the print proxy must be Online, and you must select a printer that has a status of “ready to print”. If the print proxy and/or the printer is offline, then the labels will be printed through your browser. Settings,Getting Started / Help printing hardware}', 31='{type=number, value=0}'}, {id=191604258743, createdAt=1750439292746, updatedAt=1769704684346, path='how-do-i-print-labels-for-my-shipstation-integration-from-the-rain-system', name='How do I print labels for my ShipStation integration from the system?', 2='{type=string, value=https://rainpos.my.site.com/s/article/How-do-I-print-labels-for-my-ShipStation-integration-from-the-LifeSaver Software-system}', 4='{type=list, value=[{id=1, name='rain_pos', order=0, label='Rain POS'}, {id=2, name='like_sew', order=1, label='Like Sew'}, {id=3, name='jewel360', order=2, label='Jewel360'}, {id=4, name='music_shop_360', order=3, label='Music Shop 360'}]}', 6='{type=string, value=
You will print your shipping labels in LifeSaver Software under the Orders area. Click to open the transaction you want, then click the Update button in the Shipping area. You will see a button to Print Shipping Label for orders in which ShipStation shipping methods were used. For more information on how to set up and work with ShipStation, click here: Configuring Your Shipping Settings
}', 22='{type=option, value={id=3, name='faq', order=2, label='FAQ'}}', 9='{type=string, value=How do I print labels for my ShipStation integration from the system?}', 25='{type=number, value=0}', 26='{type=list, value=[{id=190209692544, name='Orders'}, {id=190209692545, name='Settings'}, {id=190209692688, name='Getting Started'}]}', 28='{type=string, value=How do I print labels for my ShipStation integration from the system? You will print your shipping labels in LifeSaver Software under the Orders area. Click to open the transaction you want, then click the Update button in the Shipping area. You will see a button to Print Shipping Label for orders in which ShipStation shipping methods were used. For more information on how to set up and work with ShipStation, click here: Configuring Your Shipping Settings Orders,Settings,Getting Started / Help ecommerce website settings printing onboarding}'}]Filter by Category
- Reports
- Getting Started
- Customers
- Customers
- Customers
- Getting Started
- Customers
- Customers
- Invoices
- Inventory
- Inventory
- Inventory
- Inventory
- Inventory
- Inventory
- Getting Started
- Inventory
- Inventory
- Inventory
- Inventory
- Getting Started
- Invoices
- Invoices
- Getting Started
- Invoices
- Invoices
- Invoices
- Invoices
- Invoices
- Getting Started
- Invoices
- Getting Started
- Work Orders
- Work Orders
- Work Orders
- Getting Started
- Work Orders
- Work Orders
- Work Orders
- Work Orders
- Work Orders
- Work Orders
- Production
- Production
- Production
- Getting Started
- Production
- Reports
- Getting Started
- Reports
- Reports
- Reports
- Reports
- Reports
- Reports
- Reports
- Reports
- Reports
- Reports
- Reports
- Reports
- Reports
- Reports
- Settings
- Getting Started
- Settings
- Getting Started
- Settings
- Settings
- Getting Started
- Settings
- Getting Started
- Settings
- Settings
- Settings
- Settings
- Settings
- Getting Started
- Settings
- Settings
- Settings
- Getting Started
- Settings
- Inventory
- Getting Started
- Getting Started
- Getting Started
- Getting Started
- Getting Started
- Getting Started
- Getting Started
- Getting Started
- Getting Started
- Getting Started
- Settings
- Settings
- Marketing
- Settings
- Getting Started
- Inventory
- Inventory
- Payments
- Admin
- Admin
- Admin
- Inventory
Search results for: Printing Labels
AI Overview
Sort by Relevance
Description
No exact match found. We are trying to find relevant matches. Please wait or add a new keyword.
Need Help?
Can't quite find the answer you're looking for? Our support team is just a call away.