As you build work orders that use materials, you are able to do Vendor Purchase Orders for the items you need. This article will show you how to set up to order from your vendors and how to build and send your purchase orders. Take a look at how much time this can save you!
Setting Up Vendors for Purchase Orders
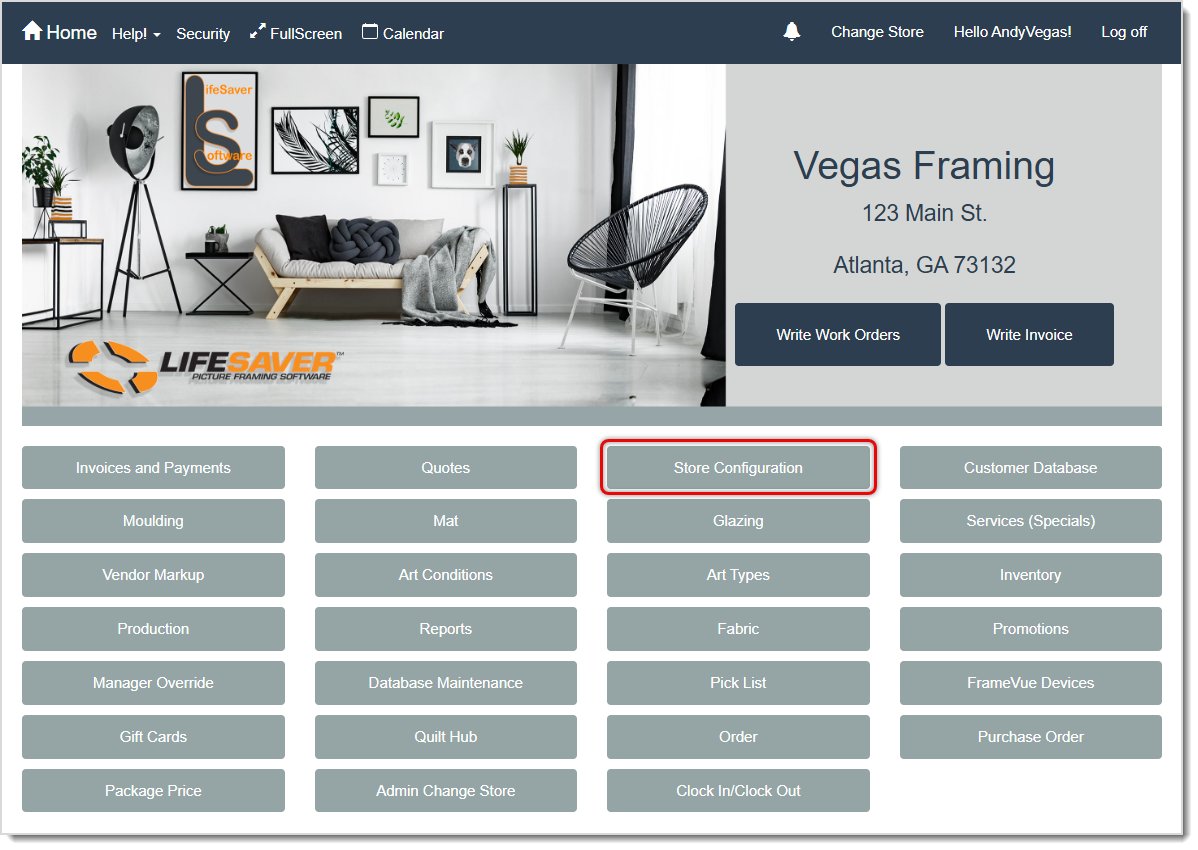
Before you can send Purchase Orders, you'll need to configure the Vendors information so the orders will contain what they need. Start by clicking on Store Configuration on the system Home page.
Initially, you won't have any Vendor Order Configs, which allow you to send Purchase Orders to the Vendor, so you'll need to create your first one using the steps below.
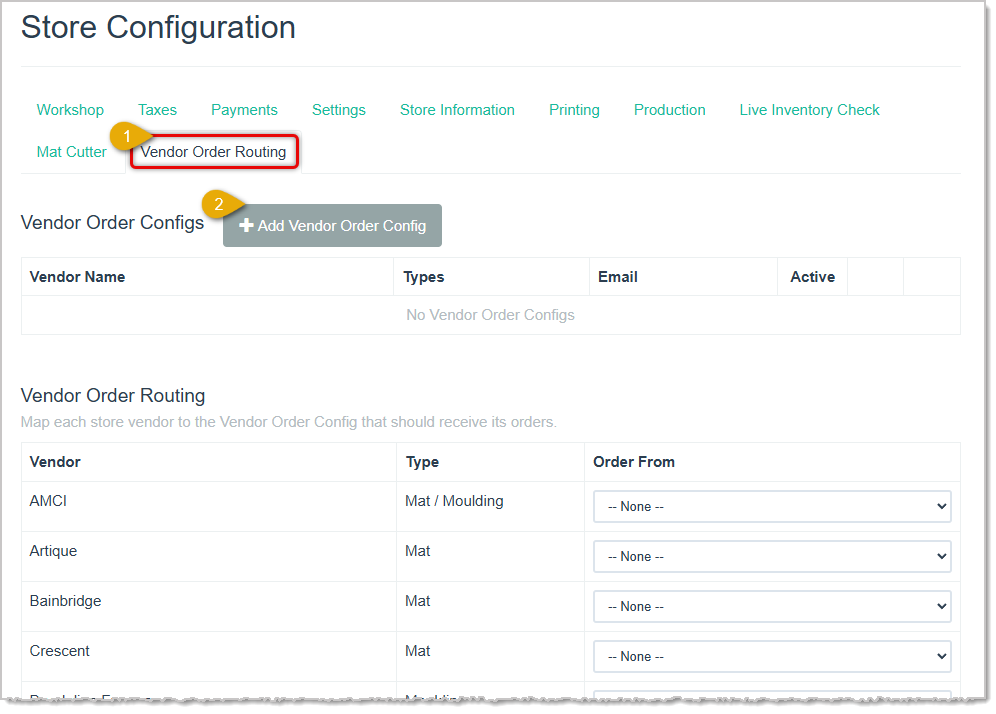
- On the Store Configuration page, go to the Vendor Order Routing tab.
- Click the +Add Vendor Order Config button. The Add Vendor Order Config window will open for you.
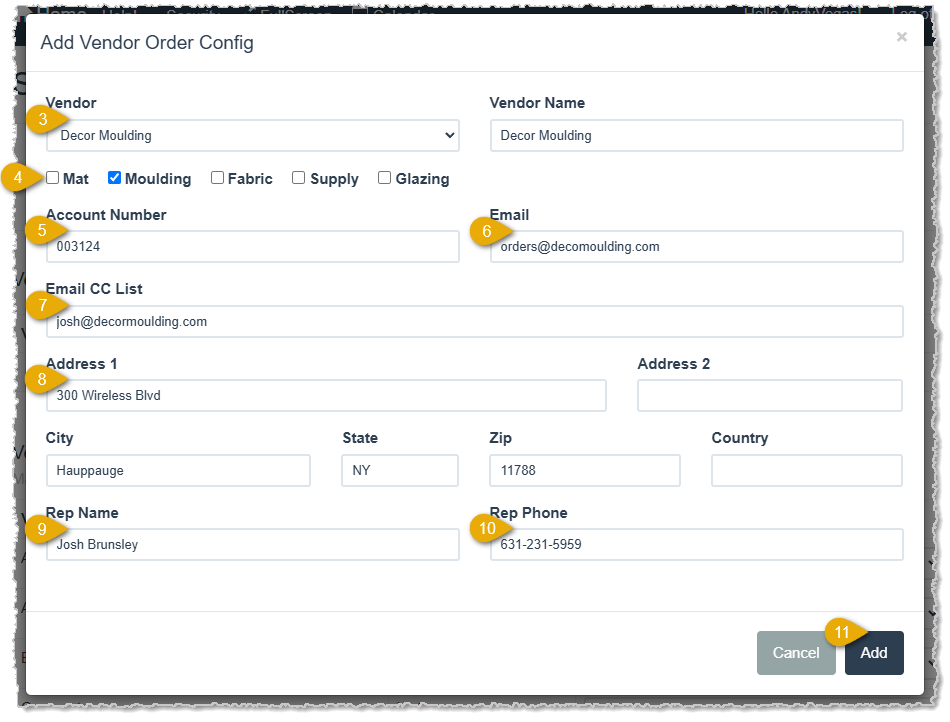
- From the Vendor drop-list, select the vendor you want to set up. The Vendor Name field will populate automatically when you make your selection.
- Check the boxes for the types of materials the vendor provides.
- Enter your Account Number with the Vendor. This will display in your PO emails, PDFs, and printouts.
- Enter the Email the vendor uses for Purchase Orders from stores.
- Enter any additional email addresses that need to be copied on orders. You can list them separated by commas and spaces as in this example: ccemail1@email.com, ccemail2@email.com, etc.
- Enter the street address of the Vendor's ordering location.
- Enter the Rep Name of your account manager, if they have one for you.
- Enter the phone number of your account manager in the Rep Phone field.
- When you've finished configuring the Vendor, click the Add button in the lower right to save your work.
You'll see the Vendor in the Vendor Order Configs area. Use the steps below to work with your saved Vendor Configs and to set their Vendor Order Routing, as described below:
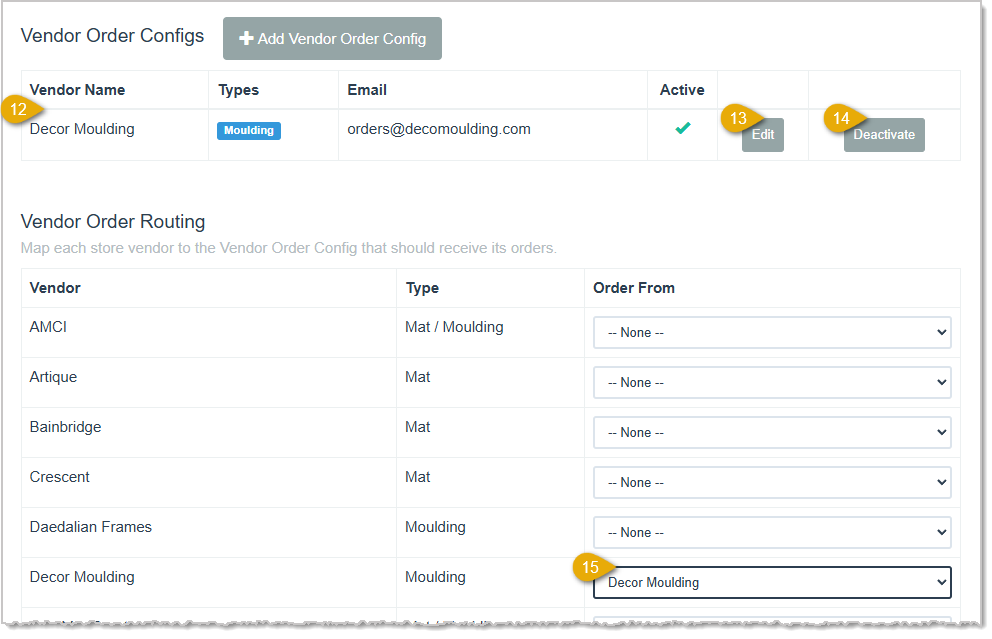
- You'll see the Vendor Order Config details for your saved vendor, including Vendor Name, material Types they provide, the primary order Email, and whether or not they are Active.
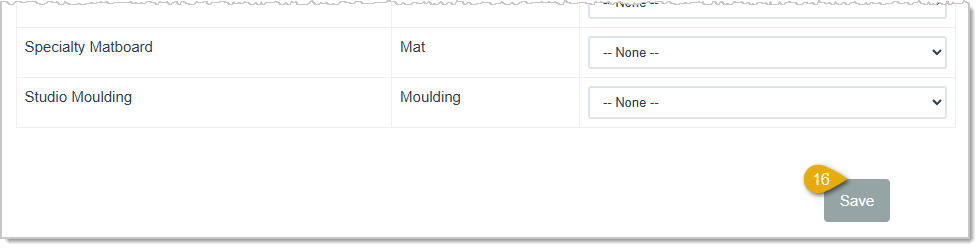
- You can click to Edit the Vendor Order Config. This will open the Edit Vendor Order Config window (similar to the Add window detailed above) and you can adjust what you need and click the Save button to update the configuration.
- If you will no longer order from the vendor using this function, you can click the Deactivate button to make their listing inactive.
- Find the Vendor you configured in the list on the left and in the Order From column, set the Vendor's name so they are one of your options in generating Purchase Orders when you need materials listed in Work Orders.
- At the bottom of the page, be sure to click the Save button to save your configurations.
Repeat these steps for other Vendors to whom you wish to send Purchase Orders.
Working With Purchase Orders
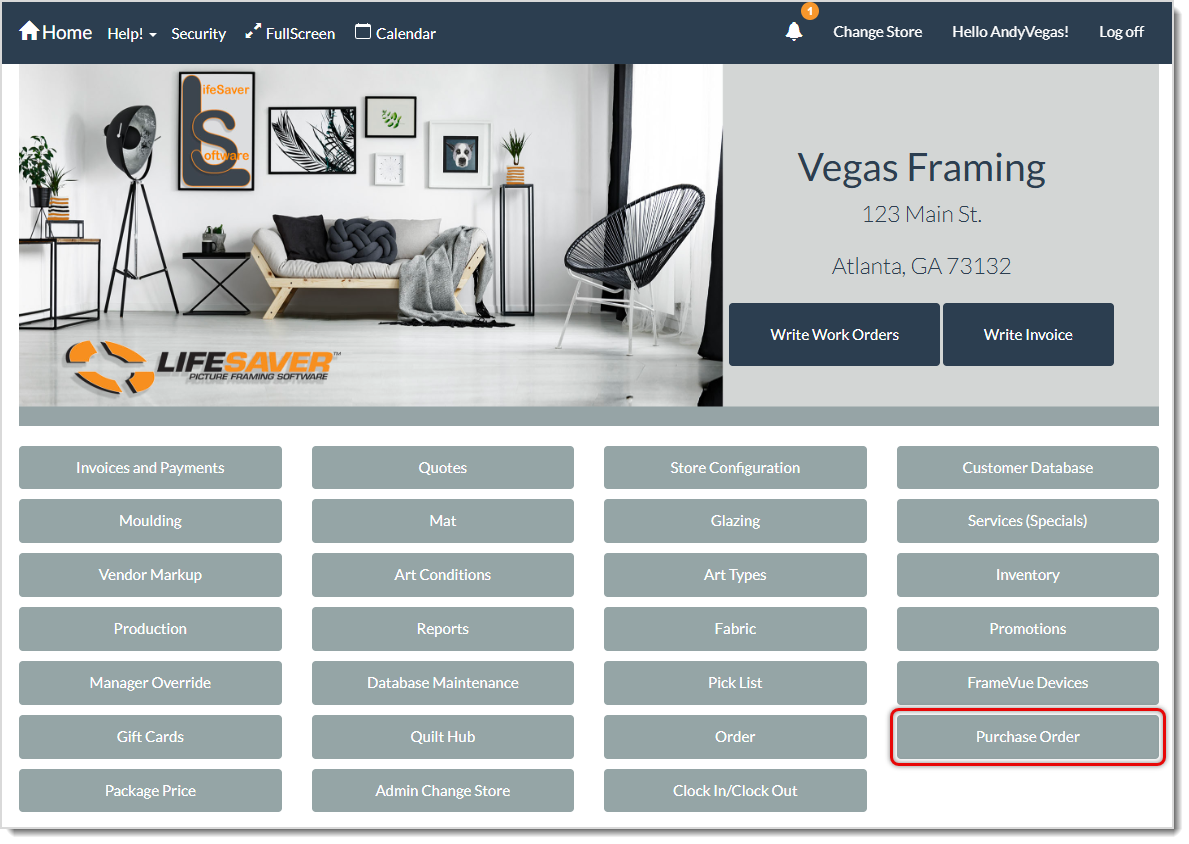
After you've set up your Vendors for ordering, as described above, you can begin creating and sending Purchase Orders. To start, on the system Home page, click the Purchase Order button.
On the Create Purchase Order page, you'll see a list of Work Order materials that need to be ordered. The materials list includes the Work Order Number, Item Number, Size, Material type, Vendor name, Unit of Measure, Quantity, Footage, and Due Date for each item. You can set a specific Date Range using the Start Date and End Date controls if you need to narrow down your list of items. Here is how to work with the functions on the page:
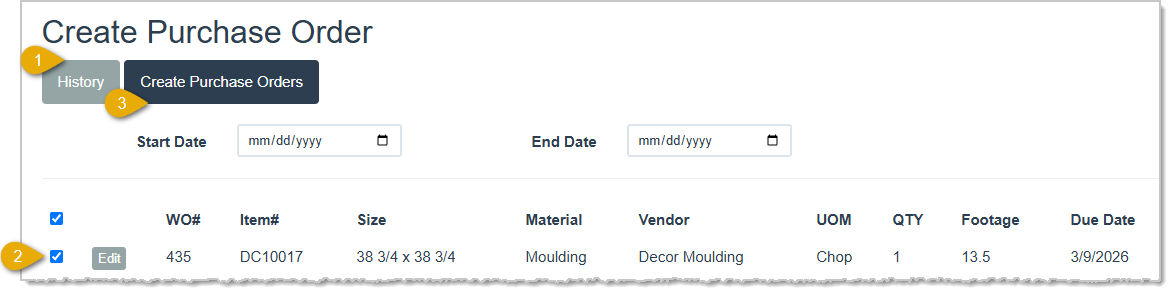
- If you need to see your list of saved Purchase Orders, you can click the History button. Please note that all of your POs of all statuses will be listed on the History page for you. You can go to the Create Purchase Order page, click on any Purchase Order line item to view its Details page, Delete purchase orders, if needed, and you can check the box to Show Deleted Orders, as pictured below.

- Check the boxes for the materials for which you'll be creating Purchase Orders. If you want to select everything, click the checkbox in the table header row at the top of the checkboxes column to Select All.
- Once you have selected the items you want to order, click the Create Purchase Orders button at the top.

- You can click the Generate PDF button if you need a copy for your records. Please note that when you email the order to the vendor in #5 below, a PDF for the order will automatically be included.
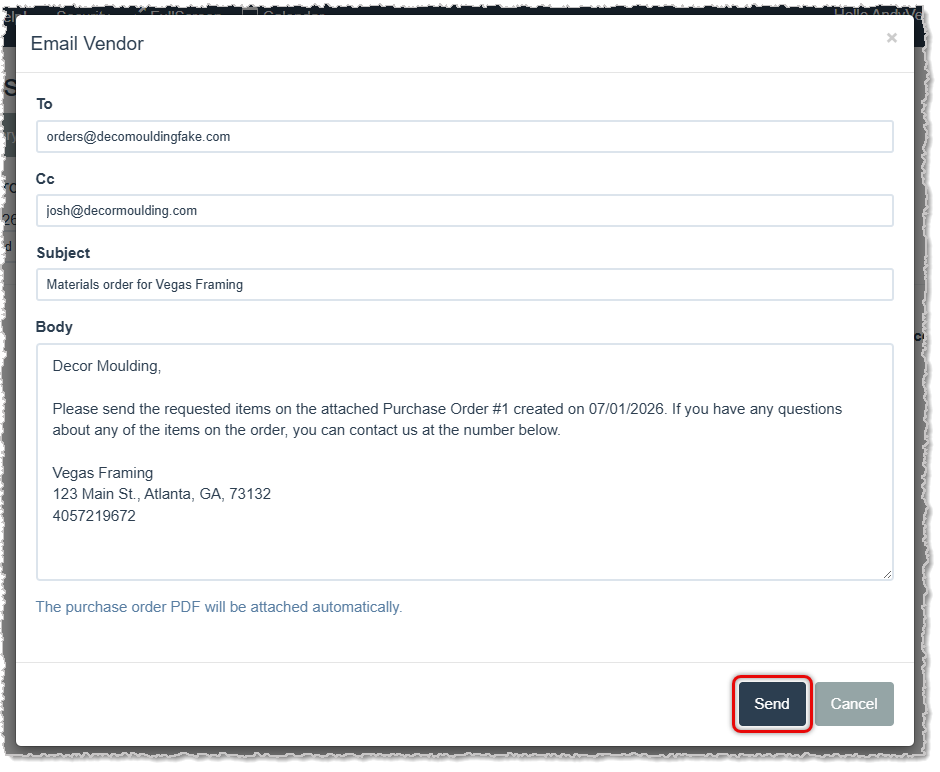
- When you are finished configuring your Purchase Order and if you're ready to send it, click the Email Vendor button and an Email Vendor window will open and you can adjust the email as needed, then click the Send button when you're ready to send it.
- You are able to manually adjust the Status of the Purchase Order using this drop-list, but it will automatically display the current status for you. Statuses include Not Placed, Placed, and Received. Whenever you receive a shipment of a Purchase Order, you will want to reopen the PO Details page from the History list and set the order Status to Received.
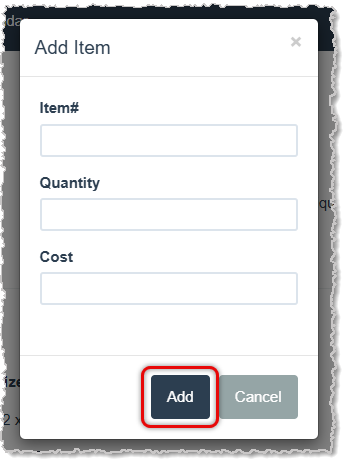
- If there are some other materials or items you need from the Vendor for this PO you can click the Add Item button and the Add Item window will open for you. Enter the Item Number, the Quantity you are ordering, and the expected Cost for the item, then click the Add button to add it to the PO.
- The PO will list the following details for each of the items in the order: Work Order Number, Item Number, Size (width x height), Material type, Unit of Measure, Quantity being ordered, Footage, Unit Price, and the total Price for the quantity being ordered. The list also provides your expected Total for the order at the bottom.
⚠️Please Note: The Cost amounts for items, as well as the Prices and Total you see in the Purchase Order are estimates based on your expected Cost. Vendor material pricing changes over time and may increase on the invoice you get from the Vendor.
An example PDF of the Purchase Order the system sends to the Vendor looks like this:

Frequently Asked Questions
Q: When I was on the Create Product Order page I selected everything, so there should be Purchase Orders for multiple vendors. But the system only opened one, which I configured and sent. How do I get to the other POs?
A: From the system Home page, click the Purchase Order button, then on the Create Purchase Order page, click the History button. You will see your Purchase Orders for the other Vendors and they will be in a Not Placed status.
Q: I have a question, but I can't find my answer here, how do I get more assistance?
A: You can ask any question at the link below, once received one of our technicians will be in touch! If you need immediate assistance, the LifeSaver Software team is available Monday through Friday, from 9:00am to 6:00pm Eastern time. Feel free to contact our support team at: 1-800-381-0600, extension 2. Or you can email us at support@lifesaversoft.com and we will respond within 24-hours.
 July 01, 2026
Is this page helpful?
×Help us improve our articles