Working With Fabrics

October 09, 2025October 09, 2025

Fabric can be utilized in framing in a variety of ways, so knowing how to work with the Fabric page in the LifeSaver Software System is necessary. In this article, you will find information on all of the Fabric functions as well as Fabric vendors. Keep reading to find out more.

Image displaying the LifeSaver Home page, highlighting the Fabric button.

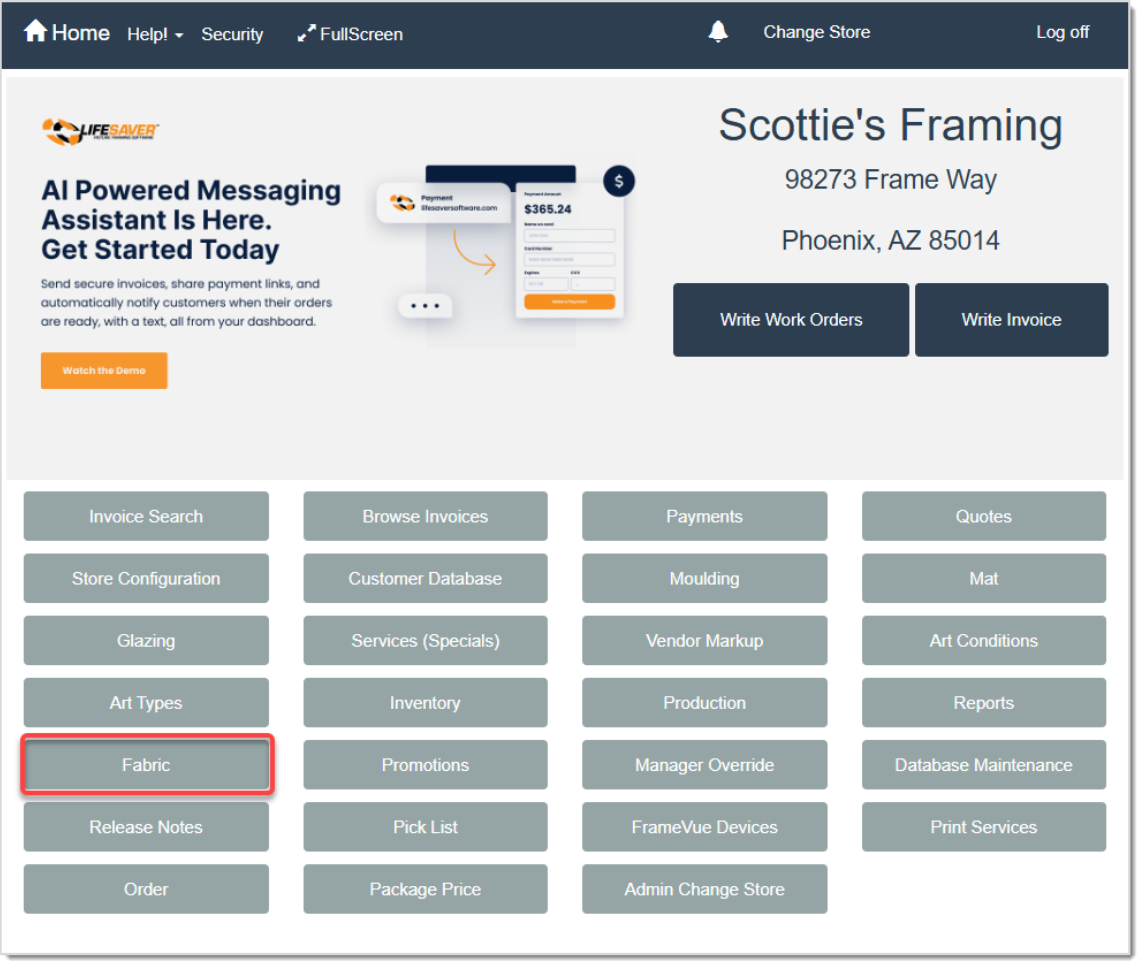
To access this function, click the Fabric button on the LifeSaver Software Home page.


Understanding the Fabric Page

Image displaying the Fabric page of the LifeSaver software with key features highlighted.

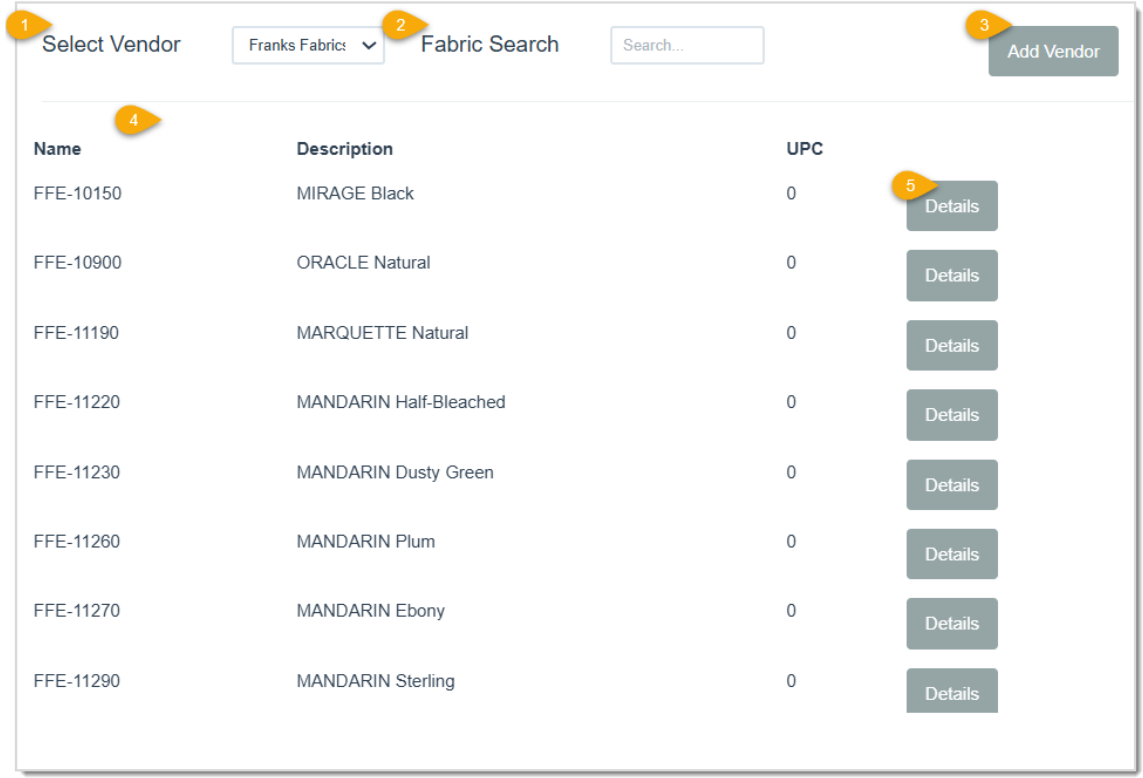
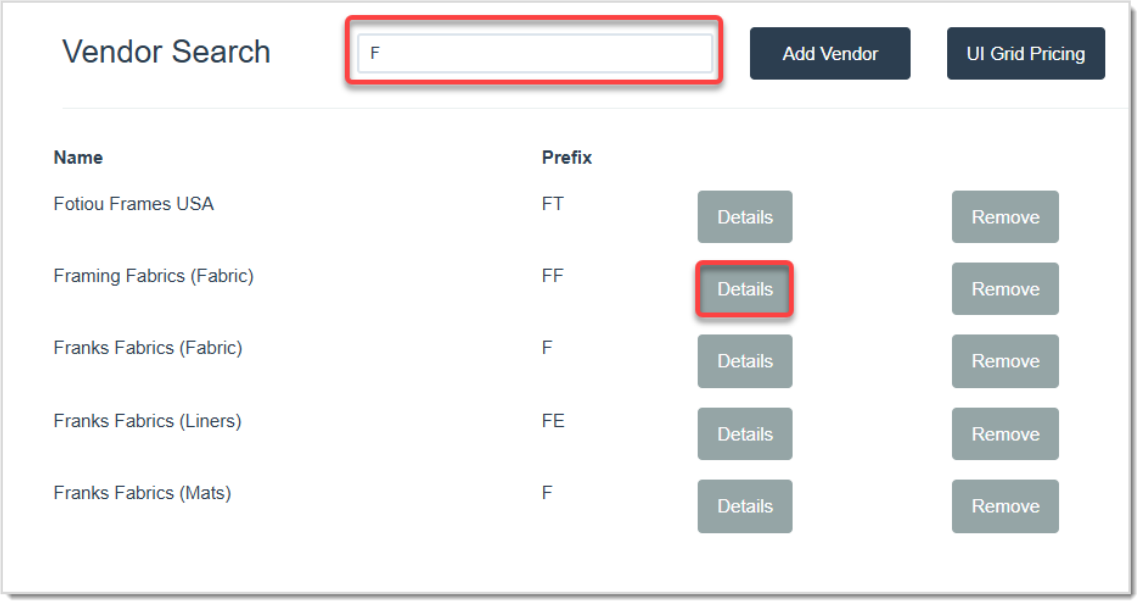
Before working with the Fabric vendors on this page, it’s important to understand what each function does:

  1. Select Vendor – Click the drop-list and select the Vendor you would like to search. All fabric inventory for that vendor will load on the page. 
  2. Fabric Search – Click into the field and enter in the item number, name, color, or anything else you can remember. The page will automatically fill in with results as you type.
  3. Add Vendor – Click this button to go to the Vendor Search page where you can Add Vendors or search for existing ones.
  4. Vendor List – This table will display the findings of your Vendor selection and Fabric Search.
  5. Details – Click this button to go to the Fabric Details page for the associated line item, shown below.


The Fabric Details Page

Image displaying the Fabric Details page of the LifeSaver software.

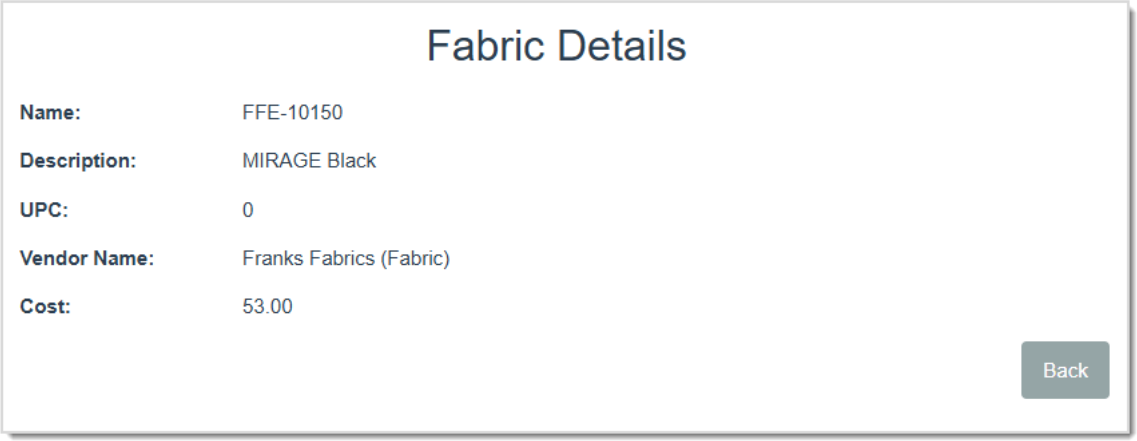
By clicking the Details button on the Fabric page, you open the Fabric Details for the associated Fabric item. This page will give you the Name and Description of the item, the UPC (Universal Product Code) number, the Vendor Name, as well as the Cost per yard. Click the Back button to navigate to the Fabric page. 


Fabric Details and Markup

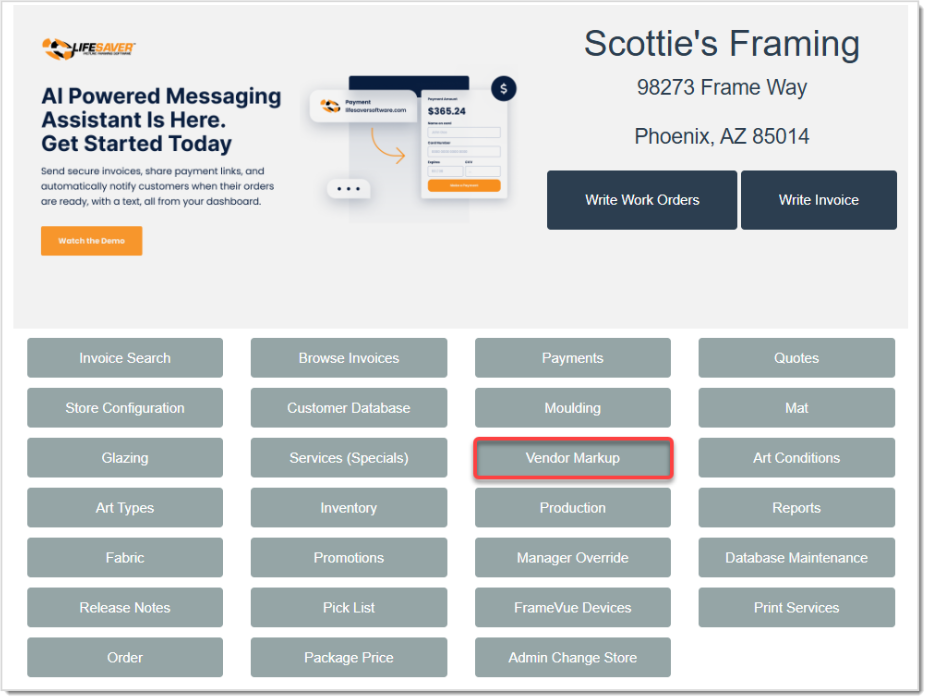
You will need to set your markups for each Fabric vendor you added to your database to determine your store’s retail cost for each vendor’s products. The following categories can be set for each: Minimum price to Maximum price range, the Markup Amount and the Vendor Discount. The costing method for fabric is calculated by yard. 

  • To get to the Vendor Details page, click the Vendor Markup button on the LifeSaver Software Home page.
    Image displaying the Vendor Markup button on the LifeSaver Home page.
  • The Vendor Search page will open and you can search for the Fabric Vendor for whom you want to set markups.
    Image displaying the Vendor Search page, highlighting the Search field and the Details button.
  • After searching and finding the Vendor you need to edit, click the Details button highlighted above.
    Image displaying the Vendor Details page of the LifeSaver software.
  • On the Vendor Details page for the Fabric Vendor you selected, enter in the needed Markups. Click the Add Row button to add additional Fabric values if applicable.
  • If you added custom markups and decide to use default markup, you can click the Apply Default Markup button in the upper right. 
  • Don’t forget to click on the Save button to save the completed markup table.

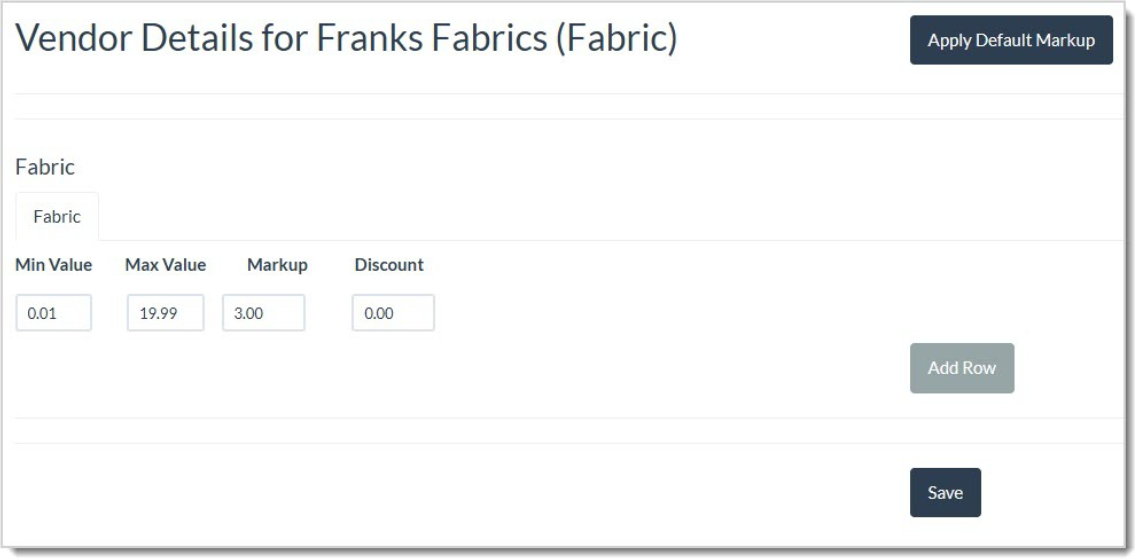
💡Pro Tip: You can manually delete existing data in the markup fields to remove and enter in new data. 

For more information on Vendor Markups, click the link below for Working with Vendors.


Add Fabric to a Work Order

Image displaying the Write Order page, highlighting the Mats / Fillets / Fabrics field where you can add fabric items to an order.

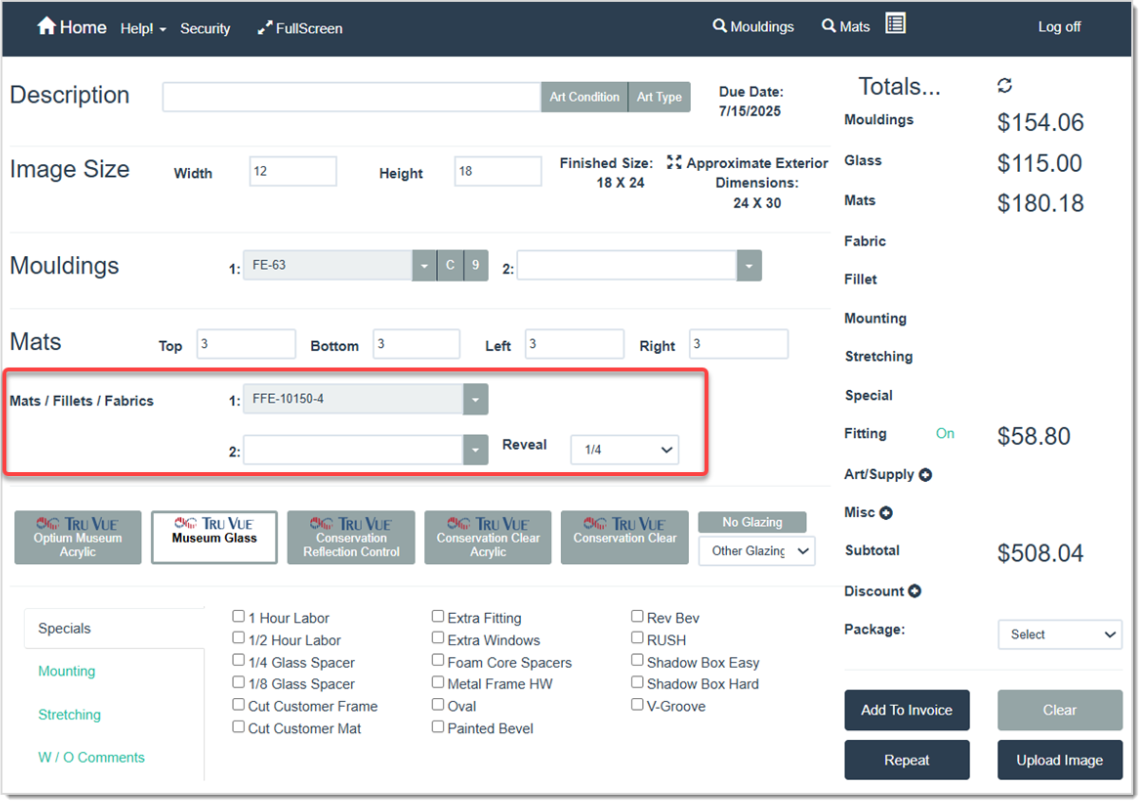
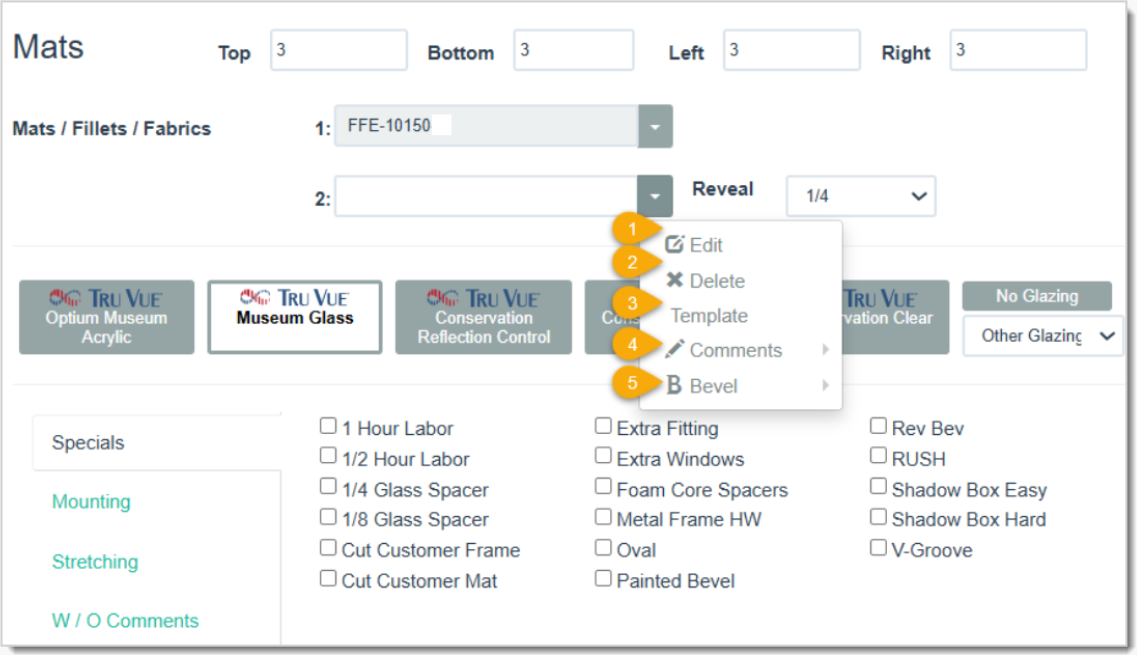
To add a fabric to your order, type in the fabric item number into the highlighted field above labeled Mats / Fillets / Fabrics. Within this field, clicking the arrow will reveal drop-list menu items:

Image displaying the Write Order page, highlighting the functions in the drop-list of the Mats / Fillets/ Fabrics field.

  1. Edit – Click the Edit option to adjust the text in the field. This is only pertinent if the field is filled in.
  2. Delete – Click to remove the selected field.
  3. Template – Click this to select a template in the Select Template window then click the OK button to save your selection.
  4. Comments – Click this to add your comments for the fabric selection in the field.
  5. Bevel – Click to select Reverse or Standard.


Related Links

Working with Moulding

Working with Mats

Working with Glazing

Working with Vendors


Frequently Asked Questions

Q: I have a question, but I can't find my answer here, how do I get more assistance?

A: You can ask any question at the link below, once received one of our technicians will be in touch! If you need immediate assistance, the LifeSaver Software team is available Monday through Friday, from 9:00am to 6:00pm Eastern time. Feel free to contact our support team at: 1-800-381-0600, extension 2. Or you can email us at support@lifesaversoft.com and we will respond within 24-hours.

Need Help?

Can't quite find the answer you're looking for? Our support team is just a call away.