The Promotions page is an easy-to-use tool to create and edit great deals for your customers with ease. Whether you want to run a seasonal sale, reward new customers, or create one-time events, promotional discounts can help you increase foot traffic, upsell custom frames, and build customer loyalty. Read on to see how you can easily create and edit promotional discounts and keep it updated whenever you need.
Creating and Editing Promotional Discounts
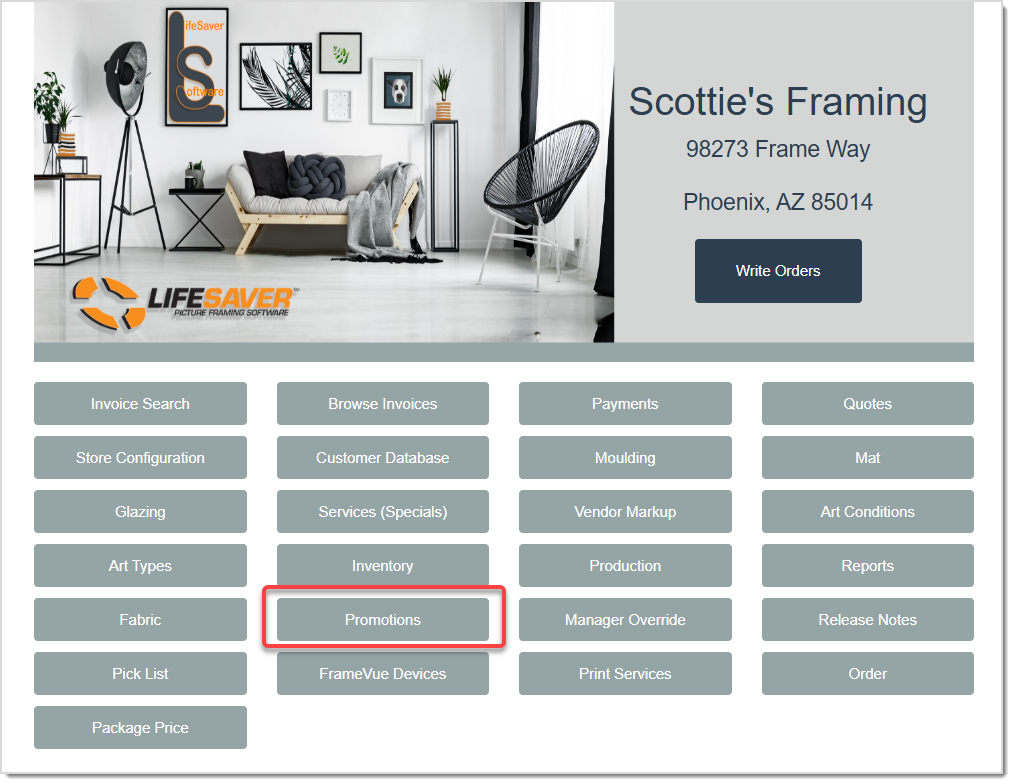
On your LifeSaver Software Home page, click the Promotions button which will take you to the Promotions page. From here, you can view, create, edit, or delete promotional discounts as you see fit.
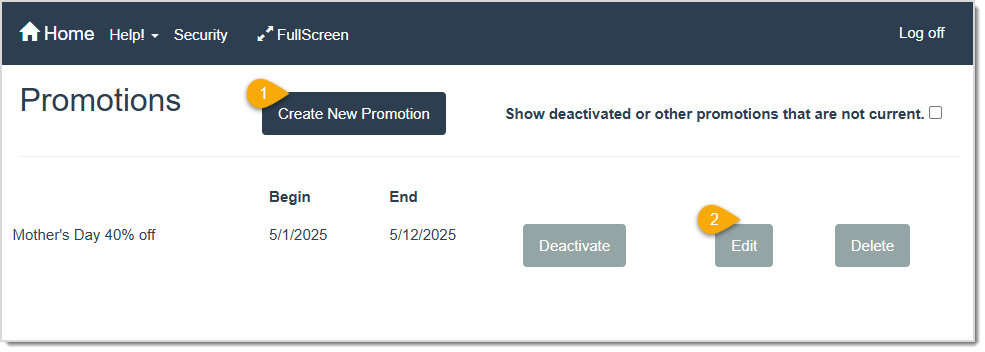
- Create New Promotion – Click this button to take you to the Create Promotion window where you can add details for your new promotion. The only required field in this window is the Name. When you’ve entered all needed information, click the Create button to start using the Promotion. You can find more information on this window below.
- Edit – Click this button to take you to the Edit Promotion window which has all of the same fields as the Create Promotion window. You can just fill in some fields as you’re editing an existing promotion. Once you’re done making edits, click the Change button to save your changes.
Taking a Closer Look at the Create Promotion Window
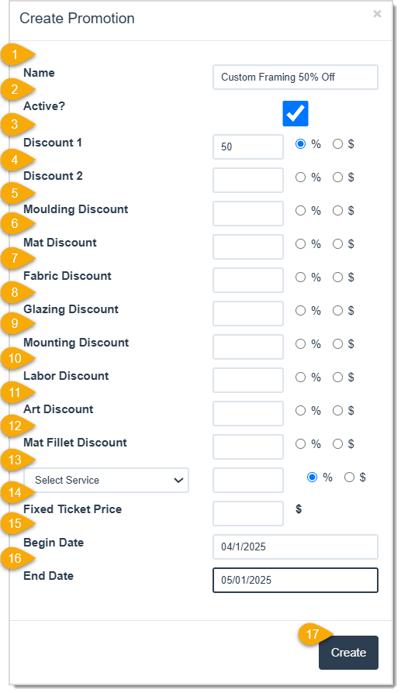
- Name – Enter in the Name of the promotion into this field.
- Active? – This box will be checked by default, so if you want this promotion to be Active, keep this checked. If not, uncheck it.
- Discount 1 – Enter the promotion’s percentage or dollar amount discount for the entire Work Order into the Discount 1 field. Please note that if you enter this discount it will be cumulative with any discount entered below. For example, if you have a discount in this area and another in the Moulding Discount field, any Moulding materials will receive both discounts and everything else will receive just this one.
- Discount 2 – If you have an additional promotion, perhaps a temporary one, you can apply an extra discount to the promotion by entering the percentage or dollar amount off in the Discount 2 field. This discount will combine with the Discount 1 percentage or dollar amount.
- Moulding Discount – If this promotion includes a Moulding Discount, enter that here. Then, select either percentage or dollar amount depending on what you prefer.
- Mat Discount – If this promotion includes a Mat Discount, enter that here. Then, select either percentage or dollar amount depending on what you prefer.
- Fabric Discount – If this promotion includes a Fabric Discount, enter that here. Then, select either percentage or dollar amount depending on what you prefer.
- Glazing Discount – If this promotion includes a Glazing Discount, enter that here. Then, select either percentage or dollar amount depending on what you prefer.
- Mounting Discount – If this promotion includes a Mounting Discount, enter that here. Then, select either percentage or dollar amount depending on what you prefer.
- Labor Discount – If this promotion includes a Labor Discount, enter that here. Then, select either percentage or dollar amount depending on what you prefer.
- Art Discount – If this promotion includes an Art Discount, enter that here. Then, select either percentage or dollar amount depending on what you prefer.
- Mat Fillet Discount – If this promotion includes a Mat Fillet Discount, enter that here. Then, select either percentage or dollar amount depending on what you prefer.
- Service Discount – If this promotion includes a Service Discount, select that Service in the drop list and enter the Discount amount in the associated field. Then, select either percentage or dollar amount depending on what you prefer.
- Fixed Ticket Price – If you want this promotion to have a fixed price, enter that amount here. Please note that using this promotion will set the price for the full order to be whatever amount you enter, regardless of whatever materials or services you use in the order.
- Begin Date – Enter in the Date that the promotion will begin here. If you enter no dates here or in the End Date field, the promotion will be perpetual, if applied.
- End Date – Enter in the Date that the promotion will end here.
- Create – Click this button to add the new promotion into the system.
Deactivating and Reactivating Promotional Discounts
On the LifeSaver Software Home page, click the Promotions button to open a list of your current discounts.

- Deactivate – Click this button to remove the promotion, meaning it cannot be applied to future transactions.
- Delete – Click this button to permanently delete the promotion.
- Show deactivated or other promotions that are not current. – Check this box to see both the active and inactive promotions in the list.
- Activate – If a promotion is deactivated, you’ll see this button. Click this button to reactivate the promotion, allowing you to use it for future transactions.
Related Topics
Working with the Packaging Price Page
Working with Customers
Writing Work Orders
Frequently Asked Questions
Q: Can I create multiple discounts in one promotion?
A: Yes, in the Create Promotion window, you can fill multiple discount fields if you want layered or tiered discounts.
Q: Do promotions automatically apply to all new Work Orders?
A: No, you must apply each promotion to a specific Work Order from the Totals column or the invoice line item discount field.
Q: I have a question, but I can't find my answer here, how do I get more assistance?
A: You can ask any question at the link below, once received one of our technicians will be in touch! If you need immediate assistance, the LifeSaver Software team is available Monday through Friday, from 9:00am to 6:00pm Eastern time. Feel free to contact our support team at: 1-800-381-0600, extension 2. Or you can email us at support@lifesaversoft.com and we will respond within 24-hours.
 October 10, 2025
Is this page helpful?
×Help us improve our articles